The Tool Desk
Outbyte Driver Updater FREEScan for outdated or missing drivers - takes under a minuteDriver Scan →Outbyte PC Repair FREEClear out junk files and repair common Windows errorsFree Scan →Some links on this page are affiliate links: if you buy through them we may earn a commission, at no extra cost to you.
Replacing simple car parts yourself—such as wiper blades, accessible filters, some bulbs and fuses—can be safe when the exact vehicle procedure is clear. The owner’s manual is your starting point: it identifies the correct part, access point, maintenance interval and any vehicle-specific precautions. Verify the replacement before removing anything, work with the engine off on level ground, and stop if the job involves safety-critical systems or produces a leak, warning light, smoke, steam, grinding, steering difficulty or abnormal braking.
This guide explains how to choose a manageable job, prepare the car, replace common consumables without forcing clips or connectors, and check the result. It is general guidance rather than a repair procedure for every make and model; access, fasteners, part numbers and reset requirements can differ substantially.
As an Amazon Associate I earn from qualifying purchases.
Recommended Free Tools
Which car parts are usually suitable for a careful DIY replacement?
The most approachable jobs are parts that are externally accessible, have a clearly identified replacement component and do not require opening a hydraulic, pressurized, high-voltage or safety system. Haynes lists wiper blades, air filters, some bulbs, fuses and batteries among repairs that may be possible with basic equipment, while noting that the correct procedure depends on the vehicle. AAA’s DIY maintenance guide similarly treats several of these tasks as home maintenance, not universal instructions for every car.
| Part or task | Why it may be manageable | Main way a mistake can cause damage | Stop and get help when |
|---|---|---|---|
| Windshield wiper blades | Usually exposed and retained by a simple adapter | The bare wiper arm can snap onto the glass; a wrong connector can detach while driving | The arm, adapter or vehicle-specific release is unfamiliar or damaged |
| Engine air filter | Often sits in a latching or screwed housing | A poor seal or loose cover can let unfiltered air into the engine; a disconnected intake or sensor can trigger faults | The housing is inaccessible, cracked or connected to equipment you cannot identify |
| Cabin air filter | Often behind the glovebox or an access panel | Forcing the panel can break retainers; an incorrectly oriented filter may not seat | Removal requires dismantling unrelated trim or the manual does not show the route |
| Fuse | Designed to be removed and replaced from a fuse panel | Installing a higher-amperage fuse can overheat wiring; repeated failures indicate another fault | The replacement blows again or the fuse rating is unclear |
| Exterior bulb | Many bulbs have a defined socket and locking tab | Touching some bulb glass, misrouting a seal or fitting the wrong bulb can cause failure or moisture entry | The assembly is sealed, access is restricted or the lighting system reports a fault |
| 12-volt battery | Some vehicles provide straightforward access and clamps | Incorrect disconnection, reconnection or shorting can damage electronics; some cars need post-replacement initialization | The vehicle is hybrid or electric, the battery is hidden, or the manual specifies a special procedure |
“Simple” describes the category, not a guarantee. The same model family can use different engines, trims, lamps, filter shapes or connector designs. Treat the table as a screening tool, then confirm the exact procedure in the current manual.
Popular on Amazon

- Never Let a Dead Battery Ruin Your Drive. The LISEN 4 in 1 Retractable Car Charger delivers reliable power for your entire journey. Compatible with standard 12V cigarette lighter sockets, it keeps phones, tablets, and devices charged during daily commutes, road trips, and long drives — the perfect practical gift for dads, truck drivers, and anyone who lives on the road.
- Daily Driver Essential: Always Ready When You Need It. Featuring two retractable cables ( USB C & Old iPhone Charging Cable ) that extend up to 31.5 inches and dual USB ports, this charger solves cable clutter while charging up to 4 devices simultaneously. Ideal for busy fathers, commuters, and families who want a tidy car and never worry about low battery again.
- Deliver full-speed PD fast charging for iPhone 18 Pro Max & iPhone 18 Pro Max & iPhone 18 Pro right inside your car. The built-in 45W PD USB-C port hits the peak charging speed for these latest iPhone models, juicing up your phone to 50% power in just 15 minutes while you drive.(Note: Maximum 45W PD output is available under 24V vehicle power supply. When used with standard 12V car sockets, the peak output is limited to 36W.)
- Standard 12V Power Solution: Designed as a dedicated USB power supply for charging devices. Note: Does NOT support CarPlay, Bluetooth, or data transfer. Compatible with most phones, tablets, and small electronics. This retractable charger is a core car organization tool, keeping your vehicle tidy. Not compatible with Micro-USB devices.
- Clutter-Free Tech Organization: Featuring dual USB ports and retractable cables, the LISEN 4 in 1 charger provides a clean car storage solution. Perfect for truck enthusiasts or as a thoughtful gift for drivers, it supports fast USB-C charging for devices like the iPhone 18Pro & iPhone 18 ProMax. Keep your vehicle organized while ensuring efficient power delivery for all your tech on the road.
What should I check before buying or removing a part?
Confirm the vehicle and the job before ordering anything. The National Highway Traffic Safety Administration’s maintenance guidance explains that the owner’s manual contains the vehicle’s maintenance requirements and schedule. Use that manual together with reliable vehicle-specific parts information.
- Record the exact vehicle. Note model year, make, model, engine and trim or configuration. A part listed for a similar year or body style may still use a different dimension, connector or mounting point.
- Read the complete procedure first. Look for access instructions, clips or screws, orientation marks, required tools, torque specifications, electrical precautions and any reset or relearn step. If you cannot explain the sequence and the safety precautions, do not start.
- Match the part, not just the name. For wipers, verify blade length and connector type. For an engine or cabin filter, verify the engine or vehicle application and the filter’s shape and seal. For bulbs and fuses, match the exact number or amperage shown by the manual or the vehicle’s marking.
- Compare old and new parts before installation. Check overall shape, tabs, holes, seals, terminals and labels. A package that looks close is not proof of fit.
- Find specifications instead of guessing. If the manual gives a torque value, fastener type, fuse rating, fluid requirement or orientation arrow, follow it. Do not substitute a stronger fuse or improvise a tool that can damage a fastener.
A model-specific repair manual or service-information source can fill in access and specification details that a general owner’s manual does not. Haynes’ explanation of DIY repairs and when to call a professional is useful as a category guide, but its procedure still needs to match your exact vehicle.
How do I set up the car safely?
Preparation prevents the most avoidable damage. Work outside or in a well-ventilated area, with the engine switched off and the key removed. Park on level ground, apply the parking brake and block the wheels whenever the vehicle’s position or the procedure makes movement possible. NHTSA-hosted general service guidance states: “Park the vehicle on a level surface, apply the parking brakes, and always block the wheels.” Read the complete NHTSA-hosted safety guideline before working.
- Wear eye protection when clips, dust or battery material could be released, and use gloves appropriate to the job.
- Keep loose clothing, hair and tools away from belts, fans and other moving parts. Never work near a running engine unless the vehicle-specific procedure explicitly requires it and you understand the risk.
- Use the correct screwdriver, socket, trim tool or fuse puller. A poorly fitting tool rounds fasteners and encourages excessive force.
- Do not work underneath a vehicle supported only by a jack. A wheel change or underbody task needs the support specified by the manufacturer.
- Keep fasteners and clips in a tray or labeled container. Take a photo before removing a cover when routing or orientation may be difficult to remember.
- Disconnect electrical power only when the manual calls for it and explains the sequence. Airbags, pretensioners, high-voltage components and other safety systems require specialized procedures.
How can I decide whether to proceed or stop?
Use a three-question screen before touching the vehicle.
- Is the part identified and accessible? You should be able to point to the component, name its retaining method and obtain a matching replacement.
- Is the risk of an error limited? A wiper or filter error is usually discoverable during a stationary check. A mistake in braking, steering, fuel, high-voltage or restraint systems can make the vehicle unsafe immediately.
- Do you have the required information and tools? If the manual calls for a special tool, a torque specification, a scan-tool reset or a procedure you do not understand, arrange professional service.
If any answer is no, stop before disassembly. AAA cautions that brake and transmission repairs can be complicated or dangerous when done incorrectly. The same conservative boundary applies to airbag and restraint components, steering and suspension work, fuel-system repairs, air-conditioning refrigerant work, high-voltage hybrid or electric systems, and any job involving a pressurized system.
Also popular on Amazon

- ✅【Designed for Magsafe】 - The most fashionable iphone car mount in 2026 Magsafe is designed for iPhone 18 Pro Max/17/16/15/14/13/12 Pro Max Mini and official Magsafe cases and other magnetic phone cases and can be fixed directly to these phones without the need to affix metal plates. All Android Phones Will Work: Metal rings are provided; they fit cases and other phones without magsafe. Based on Unique Grandmaster Design (Protected by US Design Patent No. US D1,112,194 S)
- ✅【STRONG MAGNETIC MagSafe Car Mount】 - This powerful magnetic phone holder can create a powerful attraction that firmly supports your device while allowing you to drive without distraction. it easily and securely holds your phone through bumps, sharp turns or even sudden stops, no worrying of dropping your phone.
- ✅【SUPER STICK FORCE】 - VHB Dash Mounted Holders adhesive provides strong stick force between the dashboard and the car phone holder, which can firmly stick to any plane in the car, fix your device, adapt to a variety of road conditions such as sudden braking, speed bump, and rugged mountain road.
- ✅【SAFE DRIVING VIEW】 - Mini-size, not taking up space, it is placed in the dashboard without blocking the view at all, and does not need to look down at the device to ensure your safe driving. Cell Phone Car Mount is suitable for most cars, pickups, SUV, taxi; It is the best assistant for Uber and Lyft drivers
- ✅【360° FREE ROTATION】 - With an adjustable swivel ball joint, you can rotate your smartphone or device at your own will, providing the best viewing angle. Quickly pick and place with one hand, free your hands and make calls and GPS navigation more convenient
How do I replace windshield wiper blades without damaging the glass?
Wiper blades are often a good first job, provided the new blades have the correct length and connector. The main hazard is not the blade itself; it is letting the spring-loaded metal arm fall onto the windshield.
Windows Errors? Fix Them Before They Spread
Repair common Windows errors and clear accumulated junk for a smoother, more stable PC - no reinstall needed.Free scan · no reinstallOutdated Drivers Are Slowing You Down
One free scan finds every outdated or missing driver and matches the right update for your exact hardware.Free scan · exact hardware match- Confirm fit. Check the manual or a reliable fit guide for the driver and passenger blade lengths and the connector style. Some vehicles use different lengths on each side or a special adapter.
- Park and switch off the wipers. Put the arms in the manufacturer’s service position if the manual requires it. Do not assume the arm can be lifted away from the hood on every vehicle.
- Protect the glass. Place a folded towel on the windshield beneath the arm. Lift the arm only by its sturdy section, not by the blade’s flexible rubber.
- Release the old blade. Press or slide the connector’s tab as shown in the vehicle or blade instructions. Do not twist the arm sideways or pry against the glass.
- Compare and install. Check that the new adapter matches the old one, then slide or click it into place in the specified direction. Pull gently to confirm the latch has engaged.
- Lower the arm carefully. Guide it onto the glass; never let it snap down. Remove the towel only after both arms are secure.
- Test with washer fluid. From the driver’s seat, confirm smooth movement, full contact and correct parking position. Do not run dry blades across dusty glass.
If the blade chatters, leaves untreated areas or detaches, stop using the vehicle in rain. Recheck the connector and part number; a wrong adapter or length is more likely than a windshield problem.
How do I replace an engine air filter?
An engine air-filter replacement is a useful example of a job that looks standardized but is not. AAA’s illustrated process is to locate the housing, release its clips or screws, note the old filter’s orientation, install the new filter the same way, then close and secure the housing and reconnect anything removed. Use that as a framework, not as a substitute for your vehicle’s manual.
- Identify the housing. With the engine off and cool enough to touch safely, locate the air-filter box shown in the manual. Do not confuse it with the cabin-filter compartment or another cover.
- Mark connections if necessary. Photograph or label hoses, electrical connectors and clips that must be moved. Never pull a wire; release the connector’s locking tab.
- Open without contamination. Release every clip or remove the specified screws. Keep dirt from falling into the open housing or intake duct.
- Study the old filter. Note which way the pleats, molded frame, gasket and airflow arrow face. Check whether the old filter is collapsed, wet or heavily contaminated, and inspect the housing for leaves or damage without pushing debris into the intake.
- Seat the replacement. Install the filter in the same orientation. Its frame or gasket should sit evenly in the locating groove; do not compress, fold or force it into place.
- Close the housing fully. Refit the cover, engage every clip or screw and reconnect anything removed. A cover that looks closed but is not latched can allow unfiltered air past the element.
- Check operation. Start the engine only after the intake is complete. Listen for an unusual whistle or suction noise and check for a warning light. If a connector was disturbed and the engine runs poorly, switch off and seek diagnosis rather than continuing to drive.
Filter intervals are not universal. Follow the owner’s manual and consider the inspection guidance in NHTSA’s scheduled-maintenance and multi-point-inspection document. Dusty or severe driving conditions can make inspection more important, but they do not justify inventing a replacement interval.
How do I change a cabin air filter safely?
Cabin filters are commonly behind the glovebox, below the dashboard or behind a dedicated panel, but the route varies widely. The safe procedure is to follow the access diagram, preserve the airflow direction and avoid breaking trim retainers.
Quick wins for a faster PC:
Clear out junk files and repair common Windows errorsFree Scan →Fix the driver behind crashes, sound loss and screen glitchesFind Drivers →Repair Windows errors before they cause bigger problemsFix Now →Also popular on Amazon

- High Quality Material: The coaster is made of environmentally friendly silicone, safe, non-toxic and odorless. Soft with toughness, easily embedded in the cup holder. Very durable, wear-resistant, long service life. High temperature resistance, can withstand 100 ℃ high temperature water cups.
- Wide Compatibility: The coaster has a diameter of 3.15 inches and a height of 1.18 inches, which is widely used in most vehicles, such as SUV, sedan, MPV, etc., as long as the size fits your car cup holder.
- Protection Function: Our car cup holder coaster has a carry handle design and a stand-up ring edge on its edge to effectively prevent food crumbs, drinks and water from leaking out and preventing the car cup holder from getting dirty.Meanwhile,Thickened design effectively prevents the cup holder from being scratched by the cup when driving on bumpy roads and eliminates the annoying thumping sound, making your journey more enjoyable.
- Easy to Use and Clean: With embedded installation, you just need to put it flat on the car cupholder. It is also very quick to remove, there is a small bump on the coaster, pinch it and you can easily remove the coaster. It is very easy to clean, rinse with water or wipe with a wet towel (be careful not to clean with sharp tools).
- 100% Satisfaction: Our products have quality assurance, if you have questions or are not satisfied after receiving the product, don't worry, please contact us as soon as possible, we provide after-sales service.
- Move the seat back and clear the passenger footwell so you can see the access area.
- Open the glovebox or panel only as far as the manual directs. Some dampers, straps or stops must be released; forcing the box can crack them.
- Remove the filter cover and note the arrow marked “air flow” or the filter’s orientation. If there is no arrow, photograph the old filter before removal.
- Slide the old filter out without bending it into the fan housing. If leaves or dust are present, remove them carefully without pushing debris deeper.
- Compare the replacement’s frame and seal, then slide it in the same direction. A filter that buckles or will not lie flat is not the correct fit.
- Reinstall the cover and glovebox hardware. Test the blower at several speeds and listen for rubbing; a new noise indicates a seating or foreign-object problem.
How do I replace a fuse without creating an electrical hazard?
Replacing a fuse is limited to restoring the exact circuit protection specified by the vehicle. Find the fuse chart in the owner’s manual or panel cover, switch off the relevant loads and use the specified replacement rating—never a higher rating and never a piece of wire or metal.
- Turn off the ignition and electrical accessories. Remove the key and follow any battery-disconnection instruction in the manual.
- Identify the circuit and fuse location from the chart. Some vehicles have more than one fuse panel.
- Remove the fuse with the provided puller or an appropriate tool. Inspect it in good light; do not guess from color alone when the rating is printed.
- Install a fuse with the same amperage and specified type. It should fit without force.
- Restore power and test the affected function while stationary. Keep spare fuses of the correct ratings, not an assortment of higher values.
If the replacement blows immediately or soon afterward, stop replacing fuses. A short, overloaded component or damaged wiring needs diagnosis. Repeatedly fitting new fuses can turn an electrical fault into overheated wiring or a fire risk.
How do I replace an exterior bulb?
Bulb access and bulb technology vary. A manual may direct you to remove a rear cover, twist a socket, release a retaining clip or remove part of the lamp assembly. Follow that route exactly; do not pry a sealed lamp or substitute a bulb based only on appearance.
- Switch off the lights, remove the key and let the bulb cool. Verify the exact bulb number and whether the vehicle uses a replaceable bulb or a sealed LED assembly.
- Open the access cover and note the socket orientation and seal. Keep dirt and moisture away from the opening.
- Release the connector or retaining spring as shown in the manual. Pull the socket or bulb by its intended base, not by the wires.
- For bulb types whose instructions warn against touching the glass, hold the new bulb by its base or wear clean gloves. Oil or contamination can shorten bulb life.
- Seat the bulb fully, reinstall the seal and reconnect the socket. A pinched seal can allow water into the lamp.
- Test low beam, high beam, turn signal, brake or reverse operation as applicable. Check both sides and confirm the instrument panel shows no lighting fault.
If the lamp remains out, do not keep swapping bulbs. Check the fuse and connector only as the manual permits; a wiring or control-module fault needs professional diagnosis.
What’s actually slowing this PC down?
Pick the symptom - the matching free tool is one click away.
Can I replace a 12-volt battery myself?
Possibly, but a battery is not automatically a beginner job. Access, terminal locations, hold-down hardware, ventilation, anti-theft settings and post-replacement initialization vary by vehicle. Read the exact manual procedure before disconnecting anything, and do not work on a hybrid or electric vehicle’s high-voltage system as a conventional battery job.
Also popular on Amazon
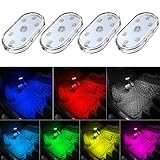
- 7 Colors Car Light: The led interior car lights are built-in 6 RGB LED lamp beads, which can be changed 7 different colors by touching, such as white, red, green, blue, yellow, pink purple, ice blue. The colors are bright and vivid, but not dazzling.Attention: Please charge before use.
- Touch Switch Design: Our led lights for car interior features touch control, one-key perspective lighting. Long touch to turn on/off, touch once to change the colors.
- Easy to Use: Stick the the iron plate in one place with double-sided tape, then put the light on it to complete the installation and fixation. Due to magnetic design, quickly install and remove, you also can attach the interior car lights to other metals.
- Portable & USB Rechargeable: Compact size, easy to carry, does not take up space. The wireless car led lights interior is charged by the USB cable, only need takes 40 minutes to fully charge the lights at a time, and keep lighting for about 2 hours.
- Wide Application: LED touch lights can be installed in dark places, such as storage boxes, armrest boxes, seat corners, etc. It's also suitable for bedside lights, wardrobe lights, reading lights, backpack lights, place it anywhere in the room, any dark place can be illuminated by it.
- Confirm the replacement battery’s physical size, terminal layout and required specification.
- Identify the hold-down and any vent tube or sensor connection. Do not lift a battery by a damaged case or pull on a sensor wire.
- Follow the manufacturer’s stated disconnect and reconnect sequence. Some vehicles can lose settings or require a reset, relearn or registration procedure afterward.
- Prevent tools from bridging the terminals or terminal to bodywork. Keep metal jewelry away from the battery area.
- Secure the battery and every cover, clamp, vent and sensor before starting the engine. A loose battery can move and damage wiring.
Stop if the battery is leaking, swollen, frozen, inaccessible or connected to equipment you cannot identify. Have a qualified technician handle high-voltage components and any vehicle-specific electronic procedure you do not understand.
Independent reader supportYour contribution helps us test, update, and keep practical guides available for everyone.What should I check before driving after the replacement?
A repair is not complete when the new part is installed; it is complete when the vehicle is reassembled, the part is secure and the function is verified.
- Account for every part. Confirm that all clips, screws, covers, connectors, seals and tools are removed from the engine bay or passenger compartment.
- Check seating and retention. Tug gently on a wiper blade, confirm a filter cover is latched, verify a bulb socket is locked and ensure a fuse is fully inserted.
- Look for leaks or loose lines. A fluid leak, fuel smell, damaged hose or displaced electrical connector is a stop condition.
- Test while stationary. Operate wipers with washer fluid, lights and interior blower before moving. Listen for new rattles, grinding, knocking, hissing or belt noise.
- Watch the instruments. A new warning light, rough running, changed drivability or abnormal electrical behavior means stop and investigate from the manual or arrange professional help.
- Make the first drive low-risk. If the stationary checks pass, drive only where you can stop safely and recheck the function. Do not take an uncertain repair onto a high-speed road or into severe weather.
What mistakes most often damage a vehicle?
- Starting without the manual: guessing the access route can break trim, clips, seals or connectors.
- Buying by appearance: similar dimensions do not prove the connector, rating, gasket or airflow direction is correct.
- Forcing a part: a component that needs excessive force is often misaligned or incorrect. Stop and compare it with the old part.
- Leaving a cover or clip unsecured: an engine air-box leak, loose battery hold-down or missing lamp seal can create a larger fault than the original worn part.
- Using the wrong specification: a higher-amperage fuse or guessed fastener setting can damage wiring or components.
- Working around a live or hot system: remove the key, allow hot parts to cool and follow battery, restraint and high-voltage precautions.
- Skipping the final test: a wiper that is not latched, a bulb that does not illuminate or a connector left unplugged may not be obvious until the vehicle is moving.
When should I call a professional instead?
Call a qualified shop before disassembly when the job concerns brakes, transmission, steering, suspension, airbags or seat-belt pretensioners; fuel or refrigerant systems; high-voltage hybrid or electric components; structural repairs; or a procedure requiring special tools, programming or specifications you cannot obtain. AAA specifically identifies brake and transmission work as potentially complicated or dangerous for an untrained DIY repair.
After any attempted replacement, do not continue driving if you find a fluid leak, smell fuel, see smoke or steam, hear grinding or knocking, have difficulty steering, feel a brake pedal lower or different than normal, or see a warning light accompanied by changed drivability. AAA also treats a flashing check-engine light as a reason to stop driving and seek help. Park safely, switch off the engine and arrange professional assessment rather than trying another replacement part.
How should I plan future maintenance?
Use the owner’s manual as the controlling schedule, not a universal internet interval. Record the date, mileage, part number and any observations after each job. Keep receipts or packaging until the replacement has passed its checks, and note which fasteners, clips or settings were disturbed.
Also popular on Amazon

- Creative DIY Mode: Choose from 16 million available colors or customize car led light effects to your liking in DIY mode via Govee Home app. Make your car stand out in unique style with creative freedom and outdoor decorations.
- Dynamic Music Mode: Built-in mic helps interior car lights sync with any music type. Liven up your road trips, weekend getaways or evening commute with colors that dance vibrantly to your favorite songs.
- Smart App Control: Manage the colors and brightness of car lights or choose music mode by one simple tap with Govee Home app. Enjoy a comfortable and vibrant driving experience with convenient control.
- 2 Lines Design: 2 lines design connect the 4 car led strip lights, attaching the inside car lights easily to any car model without worrying about exposed wiring or an untidy look.
- Simple Installation: Before you install, make sure the installation surface is clean and dry. Then attach the led lights for car to your vehicle with adhesive and support clips. Rubber tubing outside protects lights from water spills.
At each inspection, look for worn wiper rubber, damaged lamp lenses, loose battery hardware, dirty or wet filters, missing covers and warning lights. NHTSA’s summer driving and road-trip guidance also emphasizes checking vehicle condition before demanding trips. Inspection is not a license to replace parts early or to diagnose a safety fault yourself; it is a way to identify a clear, low-risk maintenance task before it becomes urgent.
The safest DIY habit is conservative: choose a job with a vehicle-specific procedure, verify the part and specification, prepare the car correctly, install without force, and test before driving. If the procedure becomes unclear or the symptoms point to braking, steering, electrical, fluid or warning-system trouble, the correct repair is professional diagnosis.
Do these 3 things before closing this tab:
1Clear out junk files and repair common Windows errors2Scan for outdated or missing drivers - takes under a minute3Repair Windows errors before they cause bigger problemsFrequently Asked Questions
How do I know whether a replacement part really fits my car?
Match the exact model year, make, model, engine and relevant trim or configuration against the owner’s manual and a reliable vehicle-specific fit guide. Check dimensions, connector type, part number, rating, seal and orientation; a similar-looking part or neighboring model year is not sufficient evidence of fit.
What should I do if a new warning light appears after a simple replacement?
Stop and check that every connector, cover, hose and fuse is correctly restored, using the manual’s procedure. If the light remains, flashes, or is accompanied by rough running, loss of power, smoke, a leak or other changed drivability, do not continue driving—arrange professional diagnosis.
Is replacing a cabin air filter safer than replacing an engine air filter?
Neither is universally safer because access differs by vehicle. A cabin filter may require fragile glovebox or trim retainers, while an engine filter requires a completely sealed housing and correctly reconnected intake hardware; choose the job whose exact procedure you can follow without force.
Can I use a stronger fuse if the specified one keeps blowing?
No. The fuse rating is part of the circuit’s protection, so a higher-amperage fuse can overheat wiring. Repeated failure indicates an underlying electrical fault that needs diagnosis rather than a larger fuse.