The safest way to learn to drive is in stages: practice legally with an authorized supervisor or qualified instructor, learn the specific vehicle’s controls, set up the seat and mirrors, master gentle starts and stops in a controlled area, and move to public roads only when you can control the car without confusion.
This guide assumes a typical U.S.-market automatic car, but the details vary among vehicles and states. A key-operated gasoline car, push-button hybrid, electric vehicle, electronic shifter, and manual-transmission car may not start or behave in exactly the same way. Read the vehicle owner’s manual and your state driver handbook before practicing. Reading this guide does not make you licensed or ready to drive independently.
1. Make sure you can practice legally and safely
Before anyone starts the car, answer three questions:
- Are you legally allowed to drive in this location? On a public road, you generally need the appropriate permit or license, a legally qualified supervising driver when required, and a vehicle that meets your state’s requirements.
- Is the supervisor qualified? The required age, license history, front-seat position, and other conditions vary by state. The supervisor must be calm, alert, and able to give simple instructions and intervene immediately.
- Is the lesson appropriate for your current ability? A beginner should not begin in heavy traffic, at night, in snow, on a highway, or in a confusing unfamiliar area.
All states and the District of Columbia have graduated-driver-licensing components, but the restrictions are not nationwide rules. NHTSA provides background on graduated licensing and teen-driver safety at NHTSA’s teen-driving resource and its graduated-driver-licensing overview. Find your current state requirements through USA.gov’s state motor-vehicle directory.
What’s actually slowing this PC down?
Pick the symptom - the matching free tool is one click away.
#1 Best Overall

- Convertible car seat grows with your child from rear-facing harness (4-50 lb) to forward-facing harness (26.5-65 lb)
- Extend2Fit 4-position adjustable extension panel provides up to 5" additional legroom, allowing your child to safely ride rear-facing longer
- Up to 50 lb rear-facing, allowing your child to safely ride rear-facing longer
- Graco ProtectPlus Engineered to the newest testing standards for side and frontal impact, and beyond—because the safety of your child shouldn’t stop at the standard
- No-Rethread Simply Safe Adjust Harness System allows the headrest and harness to adjust together in one motion
For perspective, California requires many young permit holders to complete 50 hours of supervised practice, including 10 hours at night. New York has detailed restrictions that differ by region, including rules about supervising drivers, passengers, and where a permit holder may drive. These are examples, not national requirements; use your own state DMV’s current instructions.
Private lot versus public road
An empty parking lot on private property is useful for first exercises because it removes most traffic and route-finding demands. Obtain the property owner’s permission and do not assume that a private lot exempts you from every local rule, insurance condition, or licensing requirement. A private lot also does not teach traffic lights, right-of-way, lane changes, pedestrians in normal traffic, or merging.
Move to a quiet public street only after the learner can reliably identify the brake, keep the vehicle in its lane, stop smoothly, check surroundings, and respond to the supervisor without becoming overwhelmed. A professional instructor may offer a structured lesson and, where available, an instructor vehicle with dual controls. Dual controls and professional lessons are not universally required, so confirm your state and school’s rules.
Do not drive when
- You have used alcohol, cannabis, or another impairing substance.
- A medication makes you drowsy, slow, dizzy, or less alert.
- You are severely tired, ill, distracted, angry, panicked, or emotionally unable to concentrate.
- The car has a serious warning light, defective brakes, damaged tires, poor visibility, or another unresolved safety problem.
- Weather, darkness, flooding, ice, or traffic is beyond the learner’s present ability.
2. Identify the type of car before touching the controls
Generic instructions are only a starting point. Sit in the stationary vehicle with the owner’s manual available and locate the controls before starting.
Recommended Free Tools
Automatic transmission
An automatic normally has two pedals: a brake and an accelerator. The selector commonly shows P for Park, R for Reverse, N for Neutral, and D for Drive. Some cars add positions such as S, L, B, or selectable drive modes. The letters may be on a console, a rotary dial, buttons, or a column-mounted selector.
Keep the brake pressed while selecting Drive or Reverse. The car may begin to move slowly when a drive gear is selected and the brake is released; this is called creep. Use the brake to control creep.
Manual transmission
A manual car adds a clutch pedal and a gear lever. The clutch temporarily disconnects engine power from the transmission so you can select a gear. The separate manual-transmission section below explains the additional coordination. Do not mix manual clutch instructions into your first automatic lesson.
Hybrid and electric vehicles
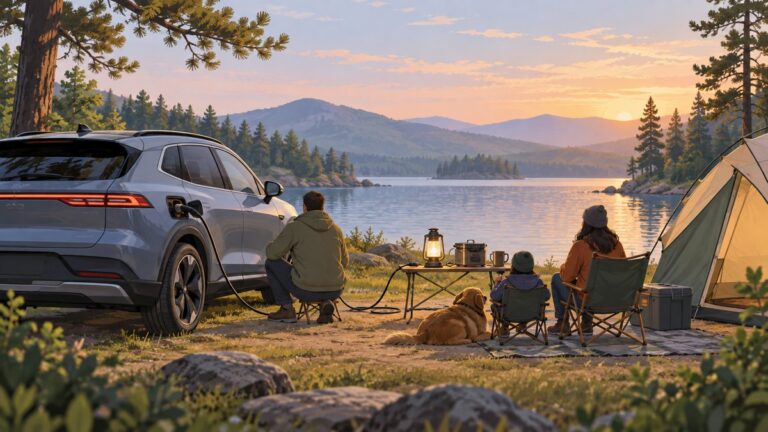
A hybrid or EV may be almost silent while ready to move. Some show a READY indicator rather than the sound of a running engine. Regenerative braking and one-pedal driving can also make the vehicle slow differently from a conventional car. Never assume that silence means the vehicle is off; check the display and owner’s manual.
Driver assistance is not self-driving
Backup cameras, parking sensors, automatic parking, adaptive cruise control, emergency braking, lane centering, and lane-keeping systems assist the driver but do not replace an attentive human. NHTSA explains that the driver remains responsible for monitoring and controlling the vehicle.
3. Learn the controls while parked
Ask the supervisor to point to each control, then identify it yourself. Do not begin moving until you can find the brake without looking down.
- Steering wheel: points the front wheels. It does not turn the car by itself; your speed, sight line, and steering angle all matter.
- Brake pedal: normally the wider pedal to the left of the accelerator in an automatic. It slows or stops the car.
- Accelerator: the narrower pedal on the right. It increases propulsion. It is not a footrest.
- Clutch: the far-left pedal in a manual car only. An automatic driver should not search for or use a clutch pedal.
- Gear selector: selects Park, Reverse, Neutral, Drive, or other vehicle-specific modes.
- Parking brake: may be a hand lever, foot pedal, or electronic switch. Learn how to set and release it in this car.
- Turn-signal and light control: communicates turns and controls headlights or other exterior lights.
- Wiper and washer control: clears rain, snow, and dirt. Learn the intermittent, low, high, and washer positions.
- Horn: alerts another road user when necessary; it is not a substitute for braking or yielding.
- Hazard-light button: activates the warning flashers. Learn when your state permits their use.
- Instrument cluster: shows speed, fuel or battery charge, temperature, warning lights, and the vehicle’s ready status.
- Defroster and climate controls: clear fog or frost from the windows. You must be able to see before moving.
- Mirrors, backup camera, and sensors: provide additional views but do not eliminate blind spots or the need to look around the vehicle.
A beginner-oriented California DMV control checklist specifically includes flashers, the emergency or parking brake, headlights, heater and defroster, horn, and wipers. The checklist is useful as an orientation aid even though your state’s test and terminology may differ.
4. Check the vehicle before getting in
This is a quick beginner check, not a substitute for a professional inspection or the manufacturer’s maintenance schedule.
Do these 3 things before closing this tab:
1Repair Windows errors before they cause bigger problems2Scan for outdated or missing drivers - takes under a minute3Clear out junk files and repair common Windows errorsWalk around the car
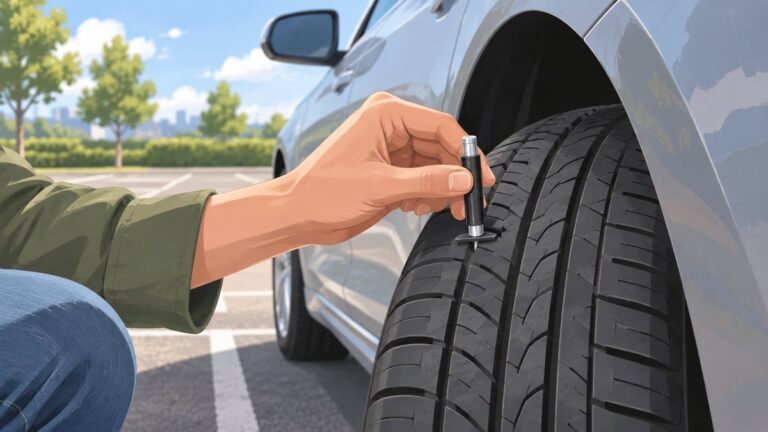
- Look for visibly underinflated, cut, bulging, or damaged tires.
- Make sure windows, windshield, mirrors, lights, and license plates are unobstructed.
- Look for children, animals, bicycles, toys, low objects, or leaks around and beneath the vehicle.
- Confirm that the fuel or battery charge is adequate for the lesson.
Inside the car
- Remove loose objects from the footwell and keep bags, bottles, and cables away from the pedals.
- Silence and store the phone. Do not hold it or program navigation while moving.
- Check that the seat belt is present, latches, and is not twisted.
- Set the climate, mirrors, route, and music before starting.
- Confirm the parking brake is set and the selector is in Park.
For a more formal pre-drive standard, review the California DMV pre-drive safety criteria, which cover items such as signals, brake lights, tires, brake, horn, parking brake, wipers, defroster, hazards, headlights, mirrors, and seat belts.
5. Set up the seat, wheel, mirrors, and belt
Good setup reduces pedal mistakes and makes it easier to see around the car.
Rank #2

- MADE TO BE WITH YOU FOR YEARS The Safety 1st Ellaris Convertible Car Seat is a 3 in 1 car seat that adapts to your growing little one with 3 modes of use, making Ellaris car seats a key piece of your family for years to come
- 3 WAYS TO USE The Safety 1st Ellaris Convertible Car Seat offers extended use as a rear facing car seat with Rear-Facing Infant (5–30 lbs.) and Rear-Facing Toddler (30–40 lbs.), and as a forward facing car seat (30–65 lbs.)
- COMFORT AND FLEXIBILITY This convertible slim car seat has a slim design for more space, and its easily adjustable 5-position headrest and harness provide a comfortable ride as your little one grows
- FEDERAL SAFETY AND SIDE IMPACT STANDARDS This convertible car seat was engineered and tested to meet or exceed federal safety standards. It also meets the federal Side Impact standard
- ADDITIONAL FEATURES YOU’LL LOVE Baby car seat with machine-washable and dryer-safe seat pad; 2 removable, dishwasher-safe cup holders; Hook-style LATCH for easy installation; Airplane ready, compact design for travel from the airport to the flight
- Sit upright. Avoid reclining so far that your head is far behind the head restraint or your arms must reach for the wheel.
- Move the seat. With your back against the seat, place your right foot comfortably on the brake. Your knee should remain slightly bent when the pedal is fully depressed; do not stretch or lock the knee. You should also reach the accelerator without shifting your whole body.
- Adjust the wheel. Tilt and telescope it, if available, so your hands can control the wheel with slightly bent elbows. Do not move so close that the air bag is directly against your chest.
- Set the rear-view mirror. Frame as much of the rear window as possible without moving your head.
- Set the side mirrors. Aim them outward enough to reduce the area hidden beside the car. You should not need to turn the side mirrors inward to duplicate most of the rear-view mirror.
- Fasten the belt. The lap portion must sit low across the hips, and the shoulder portion must cross the chest. Never put the shoulder belt under your arm or behind your back.
- Check visibility. Clear fog, frost, snow, and dirt from every window and mirror before moving.
NHTSA recommends at least 10 inches between the driver’s breastbone and the steering-wheel air-bag cover, while retaining complete control of the pedals and wheel. If your body, medical condition, or disability makes that position impossible, seek advice from the vehicle manufacturer, an occupational therapist, certified driver-rehabilitation specialist, or qualified adaptive-equipment professional rather than improvising modifications. NHTSA’s seat-belt guidance says the lap belt belongs low across the hips and the shoulder belt across the chest.
6. How to start and prepare an automatic car
Use this as a general sequence for a conventional automatic. Your owner’s manual takes precedence, especially for a push-button, hybrid, EV, or electronic shifter.
PC Slower Than It Used to Be?
A free scan shows the junk files, broken settings and background clutter dragging Windows down - then fixes them in one click.Free scan · Windows 10 & 11Outdated Drivers Are Slowing You Down
One free scan finds every outdated or missing driver and matches the right update for your exact hardware.Free scan · exact hardware match- Sit in the driver’s seat and close the door.
- Confirm the parking brake is set.
- Confirm the selector is in P. Some vehicles also permit starting in Neutral, but do not assume that yours does.
- Press and hold the brake firmly with your right foot.
- Turn the key or press the start button as directed by the owner’s manual.
- Check the instrument display. Make sure the vehicle indicates that it is on or ready and look for warning messages.
- Keep the brake pressed while selecting Drive or Reverse.
- Before releasing the parking brake or brake pedal, check forward, behind, both sides, mirrors, blind spots, and the intended path.
Oregon DMV gives a similar basic sequence: Park, parking brake, brake pedal, ignition, and a warning-light check. A current Toyota Prius manual illustrates why vehicle-specific instructions matter: some hybrids use a READY indicator as the cue that the vehicle can move.
If the vehicle does not start, the selector will not move, the brake pedal feels abnormal, or a serious warning remains on the display, keep the vehicle stopped and consult the owner’s manual or a qualified mechanic. Do not keep experimenting while the car is in a position where it could move.
7. Move, creep, accelerate, and stop in a controlled area
For an automatic car, use your right foot for both the accelerator and brake. Keep your left foot away from the pedals. Do not press the accelerator and brake together during ordinary driving.
- Keep the right foot on the brake.
- Check the intended path, mirrors, blind spots, and nearby pedestrians or vehicles.
- Signal if you are pulling from a curb, entering a roadway, or otherwise communicating a movement.
- Select D for forward travel.
- Release the parking brake according to the vehicle’s design.
- Gradually release the brake and feel the car begin to creep. Do not add accelerator at first.
- When the path is clear, apply very light accelerator pressure.
- Look well ahead and keep the car centered between the lines or other boundaries.
- To stop, release the accelerator and apply the brake progressively. Stop fully before selecting Reverse or Park.
Oregon’s novice-driver guidance emphasizes light acceleration, controlled braking, covering the brake, and using the brake to inch near obstacles. A beginner’s first exercise should be deliberately boring:
- With the supervisor beside you, release the brake and let the car creep several feet.
- Stop smoothly.
- Repeat in a straight line until the pedal response feels predictable.
- Practice gentle acceleration and progressive braking at walking speed.
- Practice wide, slow turns only after straight-line control is consistent.
When uncertain, remove your foot from the accelerator and cover the brake. If the car lurches, press the brake firmly, stop, select Park if necessary, and reset rather than trying to continue through the mistake.
8. Steer smoothly and look where you want to go
- For normal driving, begin with hands around 9 and 3 o’clock. Oregon also describes 8 and 4 as an acceptable lower position when it provides control; follow the applicable state handbook.
- Keep your thumbs outside the wheel rim rather than hooked inside it. This can reduce injury risk if the wheel moves suddenly.
- Look toward the open path and well ahead, not directly at the curb, parked car, or obstacle you fear hitting. The car tends to follow your visual focus.
- Use small, smooth corrections at normal road speeds. Avoid sawing the wheel back and forth.
- At low speed in a tight turn or parking maneuver, use larger hand movements or hand-over-hand steering as needed.
- Allow the wheel to return under control after a turn; do not let it spin freely through your hands.
- One-hand steering while looking over a shoulder can be useful during a backing maneuver, but it is not a normal cruising position.
9. Stop smoothly and accurately
- Check the rear-view mirror when traffic may be behind you.
- Release the accelerator.
- Apply the brake progressively, increasing pressure as needed rather than stabbing at it.
- Keep the vehicle straight and continue scanning.
- Stop behind the limit line, crosswalk, or vehicle ahead. Do not roll through the stop.
- In traffic, leave enough space to see the rear tires of the vehicle in front where practical, so you have room to steer around a problem.
On a normal stop, brake pressure should feel predictable. If the pedal feels soft, sinks unusually far, vibrates abnormally, or a brake warning appears, stop practicing and consult the owner’s manual and a qualified repair professional.
If the anti-lock brakes activate
With four-wheel ABS, a hard stop may produce pedal pulsing and mechanical noise. Keep firm pressure on the brake and steer toward the available escape path; do not pump a functioning ABS brake system. Confirm the exact system and instructions in the owner’s manual. California DMV gives this same basic ABS guidance.
10. Turn at intersections
Think of a turn as a sequence of communication, observation, speed control, yielding, and lane placement:
- Identify the turn well in advance.
- Signal early enough to communicate clearly, using your state’s required timing.
- Check mirrors and the relevant blind spot.
- Reduce speed before entering the turn, not halfway through it.
- Yield to people walking and bicycling and to vehicles that have the right-of-way under your state’s rules.
- Turn into the correct lane.
- Accelerate smoothly only after the path is clear.
- Cancel the signal when the turn is complete if it has not canceled automatically.
Right turns
Approach in the appropriate lane, slow before the corner, and check the crosswalk, sidewalk, bike lane, and area beside the passenger side. Do not swing wide into a second lane unless the road design or law requires it.
Left turns
Position as required by the roadway, stop behind the line when required, and yield to oncoming traffic and people crossing. Do not begin the turn so early that you cut across the center line or enter oncoming traffic. When waiting for a left turn, keeping the front wheels straight is a defensive recommendation in some handbooks, including California’s: a rear impact is less likely to push a straight vehicle into oncoming traffic.
California uses approximately 100 feet before a turn as an example of signal timing. That is not a universal U.S. rule; check your state handbook. If you miss a turn, continue straight and turn around legally later. Do not stop in traffic, reverse, or make a sudden illegal U-turn.
11. Change lanes and merge
Use signal → mirrors → shoulder check → confirm the gap → move smoothly → cancel the signal.
Rank #3

- 3-in-1 car seat grows with your child from rear-facing harness (5-40 lb) to forward-facing harness (26.5-65 lb) to highback booster (40-100 lb)
- Graco ProtectPlus Engineered: a combination of the most rigorous crash tests that help to protect your child in frontal, side, rear & rollover crashes
- No-Rethread Simply Safe Adjust Harness System allows the headrest and harness to adjust together in one motion
- Choose the perfect headrest height from 10 positions to get the safest fit for your growing child
- 6-position recline keeps your child comfy and helps for a better installation
- Check the rear-view mirror, then the side mirror in the direction of movement.
- Look over that shoulder for motorcycles, bicycles, and vehicles hidden beside the car.
- Move only when the gap is large enough for the traffic speed and your vehicle’s length.
- Change one lane at a time. Signal again and repeat the checks for another lane.
- Do not drift, weave, or change lanes merely because another driver is close behind.
- Avoid changing lanes in an intersection unless the roadway design or an immediate safety need requires it.
California DMV describes this mirror-and-shoulder-check sequence and one-lane-at-a-time approach. The exact signal timing and lane rules remain state-specific.
Merging onto a highway
Highway merging is a later-stage skill, not a first lesson. When you are ready:
- Choose the correct entrance lane and scan traffic while still on the ramp.
- Use the ramp to build speed toward the traffic flow when safe and when the ramp permits it.
- Signal and identify a gap before the ramp ends.
- Check the side mirror and blind spot immediately before moving.
- Merge smoothly without stopping unless stopping is necessary to avoid a collision.
- Do not cross solid lines or force another driver to brake.
- After merging, establish a following gap and change lanes one at a time.
Highway traffic generally has the right-of-way over entering traffic. California’s handbook advises entering at or near the speed of traffic when safe. The ramp’s markings, design, signs, and local law control the maneuver.
12. Keep a safe following distance
Use the three-second rule as a starting point:
- Choose a stationary object such as a sign, pole, or shadow ahead.
- When the vehicle ahead passes it, count one-thousand-one, one-thousand-two, one-thousand-three.
- If your car reaches the object before you finish counting, ease off and increase the gap.
Three seconds is a baseline defensive technique, not a guarantee and not a substitute for judgment. Increase the gap in rain, snow, darkness, heavy traffic, behind motorcycles, on hills, while carrying passengers or cargo, or whenever visibility and traction are reduced. California DMV discusses the three-second rule and when to create more space.
Free tools Windows power users keep installed
One-click scans. No signup required.
13. Reverse safely
Backing is difficult because the rear path is partly hidden and the front of the car swings as the steering wheel turns. Plan to pull forward instead of backing whenever practical.
- Stop completely before selecting Reverse.
- Keep the right foot on the brake.
- Select R and check that the vehicle display agrees.
- Perform a 360-degree search: look ahead, behind, to both sides, under and around the car as possible, and at mirrors and the camera.
- Yield to pedestrians, cyclists, and other traffic.
- Turn your body and look over the shoulder in the direction the car is traveling. Use mirrors and the camera as additional views, not replacements.
- Release the brake gradually and move at walking speed or slower. Use the brake to control creep.
- Keep scanning continuously until the vehicle is fully stopped.
- Stop immediately if a person, animal, bicycle, vehicle, or object appears or if you lose sight of the path.
Oregon DMV specifically recommends the 360-degree search, continuous shoulder check, and walking pace. If you cannot see adequately, stop with the brake held. Reposition the car, ask a trained spotter for help while retaining responsibility for the maneuver, or pull forward if safe.
Independent reader supportYour contribution helps us test, update, and keep practical guides available for everyone.14. Park and leave the car secure
Every parking maneuver
- Signal and check mirrors and blind spots.
- Slow to walking speed or slower.
- Keep pedestrians, children, and cyclists in view.
- Center the car in the space without touching lines, curbs, or other vehicles.
- Stop completely.
- Set the parking brake.
- Select Park in an automatic, or the appropriate gear and parking-brake procedure in a manual, as specified by the owner’s manual.
- Turn off the vehicle and check that it is secure.
- Before opening the door, check for bicycles and passing traffic.
Perpendicular and angle parking
Approach slowly, signal, scan the space and adjacent areas, and begin turning according to the space markings and the vehicle’s reference points. Straighten the wheel as the car enters. Stop when centered, not merely when the front bumper clears the line. If you are not centered, stop, select Reverse only after checking around, and correct at very low speed.
Parallel parking
- Signal and pull alongside the vehicle ahead of the open space, leaving a safe lateral gap.
- Align using the rear bumpers or the reference point taught for that particular vehicle.
- Stop, check all around, and reverse slowly while steering toward the space.
- As the rear enters, straighten the wheels and continue checking.
- Turn the wheel the other way to align the vehicle with the curb.
- Center the car, leave room for surrounding traffic, and stop fully.
Measurements used in driving instruction are not universal law. California’s handbook describes a space about three feet longer than the car, roughly two feet of lateral clearance, a roughly 45-degree backing entry, and a final position within 18 inches of the curb. Pennsylvania’s manual uses a maximum 12-inch curb distance. Treat these as state-specific examples and follow your own handbook and road-test criteria.
The Tool Desk
Outbyte Driver Updater FREEScan for outdated or missing drivers - takes under a minuteDriver Scan →Outbyte PC Repair FREEClear out junk files and repair common Windows errorsFree Scan →Parking on a hill
- Facing downhill with a curb: turn the front wheels toward the curb.
- Facing uphill with a curb: turn the front wheels away from the curb so a moving vehicle would roll toward the curb.
- No curb: turn the wheels toward the side of the road and away from the center.
- Always set the parking brake and select the appropriate transmission position. Check your state’s hill-parking diagram, because exact legal instructions and wording differ.
15. What changes with a manual-transmission car?
Use an automatic for a first lesson unless the learner specifically needs to drive a manual. An automatic lets a beginner concentrate on steering, observation, braking, and traffic rules. A manual adds clutch coordination, gear selection, stall recovery, hill starts, and a larger workload at intersections.
Manual controls
- Clutch pedal: far left; press it fully to disconnect engine power before selecting a gear or stopping in many situations.
- Brake: center pedal; use the right foot.
- Accelerator: right pedal; use the right foot.
- Gear lever: selects first, higher gears, Neutral, or Reverse. Reverse should be selected only while stopped and according to the owner’s manual.
- Neutral: no driving gear is engaged.
Starting to move
- Set the parking brake and press the clutch fully.
- Press the brake as needed and select first gear.
- Check the path.
- Release the parking brake when ready.
- Gradually release the clutch until you feel the engagement point, then add gentle accelerator pressure.
- Continue releasing the clutch smoothly while the car moves.
The exact friction point and accelerator amount vary greatly. A representative Toyota passenger-car procedure also uses clutch depressed, first gear, parking-brake release, gradual clutch release, and gentle accelerator input; the vehicle’s own manual remains controlling.
Do not rest your foot on the clutch, hold the car on a hill by slipping the clutch, or release it abruptly. Do not memorize universal shift speeds or RPMs: they depend on engine, gearing, slope, load, and vehicle design. Oregon’s manual-transmission guidance warns against riding or popping the clutch and explains why shift points vary.
If the manual car stalls
Press the clutch and brake, select Neutral, and restart when the car is secure. A stall is usually a coordination mistake, not an emergency. Practice again in a controlled area, focusing on a slower clutch release and light accelerator pressure.
Quick wins for a faster PC:
Fix the driver behind crashes, sound loss and screen glitchesFind Drivers →Repair Windows errors before they cause bigger problemsFix Now →16. Build skill before adding difficult conditions
Do not treat rain, darkness, snow, heavy traffic, hills, and unfamiliar routes as minor variations. They reduce visibility, traction, or decision time.
- Rain: turn on the appropriate lights and wipers, increase following distance, and slow according to visibility, standing water, tires, traction, and traffic. California guidance mentions reducing speed by 5–10 mph in wet conditions, but that is not a universal formula.
- Hydroplaning: ease off the accelerator and avoid abrupt braking or steering. Wait for the tires to regain contact. Do not make a sudden correction.
- Darkness: reduce speed so you can stop within the distance you can see. Keep the windshield clean and avoid staring into oncoming headlights.
- Fog or glare: use the lights and defroster appropriate to the vehicle and conditions. If you cannot see, postpone the lesson.
- Snow and ice: practice only after receiving suitable local instruction and when roads are safe. Use much more space and make gentle inputs.
- Heavy traffic: choose a route with fewer intersections and escape options until the learner can process traffic without losing control.
Ask the owner’s manual and your state handbook about special systems and conditions, including cruise-control restrictions on slippery roads.
Rank #4

- 3-in-1 harness booster helps protect your child, from toddler to youth
- Grows with your child from forward-facing harness (26.5-65 lb) to highback booster (40-100 lb*) to backless booster (40-100 lb) *To continue to meet industry standards, we have increased the weight minimum from 30 to 40 lb
- No-Rethread Simply Safe Adjust Harness System allows the headrest and harness to adjust together in one motion
- Lightweight, portable seat is ideal for busy, active parents
- One-hand, 9-position adjustable headrest grows with your child
17. Recover from common mistakes and emergencies
The car lurches forward or backward
- Remove your foot from the accelerator.
- Press the brake firmly.
- Stop completely.
- Select Park if necessary.
- Recheck which pedal is which, whether the correct foot is being used, and whether the selector is in the intended position.
Common causes include pressing the accelerator while selecting Drive or Reverse, releasing the brake too quickly, or using the wrong foot.
The vehicle drifts in the lane
Look farther ahead, reduce speed, and make small steering corrections. Do not stare at the curb or a parked car. If control is deteriorating, signal and pull over when safe. If the car consistently pulls or the steering feels abnormal, stop practicing and have it checked.
You miss a turn
Continue straight and use a legal, safe place to turn around later. Never stop in a traffic lane, reverse unexpectedly, or make a sudden illegal U-turn.
A tire blows out
Hold the steering wheel firmly, avoid panic braking, and ease off the accelerator. Let the vehicle slow gradually, signal, and move to a safe location when possible. California DMV warns that abrupt braking or abruptly removing the accelerator can cause loss of control.
The car hydroplanes
Ease off the accelerator and avoid abrupt braking or steering. Keep the vehicle pointed in the intended direction until the tires regain contact, then slow down further and increase the following gap.
The brakes feel abnormal or fail
Keep steering control, release the accelerator, activate hazards when practical, and aim for a safe place to stop. Follow the emergency braking procedure in the owner’s manual; vehicle systems differ. If the brake pedal goes to the floor or braking is seriously reduced, use emergency services and do not continue driving. Do not improvise a repair on the roadway.
Do these 3 things before closing this tab:
1Clear out junk files and repair common Windows errors2Scan for outdated or missing drivers - takes under a minute3Repair Windows errors before they cause bigger problemsThe vehicle becomes disabled
Activate hazard lights and move as far off the roadway as safely possible. Avoid standing in a traffic lane. On a freeway, follow the state’s roadside-emergency guidance. California advises using the right shoulder, exiting away from traffic only when necessary, and remaining belted inside the vehicle while waiting for help when leaving would be more dangerous. Read the California emergency guidance as a state-specific example, not a universal rule.
A collision occurs
Stop and do not leave. Call emergency services if anyone may be injured or there is immediate danger. Move the vehicle only if it is safe and legally permitted, exchange the information required by your state, and follow your state’s reporting and insurance rules. Do not argue about fault at the scene.
18. Use a staged practice plan
Each lesson should have one or two objectives, a calm supervisor, suitable weather, and a location matched to the learner’s ability.
- Stationary orientation: identify pedals, selector, parking brake, lights, signals, wipers, hazards, horn, defroster, mirrors, warning displays, and start procedure.
- Empty lot, straight lines: release-brake creep, gentle acceleration, smooth stops, and accurate pedal identification.
- Empty lot, direction changes: wide turns, lane positioning, stopping at marked lines, and controlled Reverse.
- Empty lot, parking: perpendicular, angle, and introductory parallel parking at walking speed.
- Quiet residential streets: simple route-following, signs, crosswalks, right and left turns, and mirror use.
- Moderate traffic: following distance, lane changes, more intersections, and interactions with bicycles, motorcycles, pedestrians, trucks, and school zones.
- Multilane roads: lane changes one at a time and more complex route planning.
- Highway: ramps, speed matching, gap selection, and merging only after the earlier skills are reliable.
- Special conditions: night, rain, hills, unfamiliar routes, and winter conditions separately and gradually—not all at once.
You are ready for the next level when you can
- Start, move, and stop without confusing the pedals or selector.
- Keep the car in its lane while looking ahead.
- Make smooth turns without swinging wide or cutting across lanes.
- Signal consistently and check mirrors and blind spots before lateral movement.
- Stop behind lines and crosswalks without rolling forward.
- Reverse slowly while looking around instead of relying only on a camera.
- Maintain a suitable following distance and adjust it for conditions.
- Miss a turn or make a small mistake without panicking.
- Follow a supervisor’s directions without losing vehicle control.
- Recognize when weather, fatigue, impairment, or vehicle condition makes driving unsafe.
If the learner repeatedly panics, confuses the pedals, cannot judge the car’s edges, stalls in traffic, or has a disability requiring adaptations, pause public-road practice and arrange professional instruction or a driver-rehabilitation evaluation.
PC Slower Than It Used to Be?
A free scan shows the junk files, broken settings and background clutter dragging Windows down - then fixes them in one click.Free scan · Windows 10 & 11Crashes, No Sound, or Screen Glitches?
Random freezes, missing sound and display glitches usually trace back to one bad driver. Find and replace yours safely.Free scan · under a minuteA five-minute checklist before every lesson
- Legal permit or license, qualified supervisor, permission to use the car, and appropriate insurance.
- No alcohol, cannabis, impairing medication, severe fatigue, or unsafe emotional state.
- Safe weather, visibility, traffic, and route for the learner.
- Fuel or charge, undamaged tires, clear windows, working lights, and no loose objects near pedals.
- Seat, steering wheel, mirrors, head restraint, and seat belt correctly adjusted.
- Phone silenced and stored.
- Parking brake set, selector in Park, and owner’s manual available.
- One clear lesson objective and a planned place to stop if the learner becomes overloaded.
Frequently Asked Questions
Can I learn to drive safely just by reading this guide?
No. This guide explains the sequence and gives you a safe framework, but vehicle control requires supervised practice and feedback. You also need the permit or license required by your state and must follow the current state driver handbook.
Which foot should I use in an automatic car?
Use the right foot for both the brake and accelerator. Keep the left foot away from the pedals. Do not press both pedals together during ordinary driving.
Is a backup camera enough when reversing?
No. Perform a 360-degree visual search, look over the appropriate shoulder, keep scanning, and use the camera and sensors only as supplements. NHTSA says the driver remains responsible for controlling and monitoring the vehicle.
How many hours of practice do I need?
There is no single U.S. answer. Required practice hours and restrictions vary by state, age, and permit type. Check your state DMV, then continue practicing until you can perform the readiness checklist consistently rather than relying on a number alone.
Recommended Free Tools
Should my first lesson be in a manual car?
Usually not, unless you specifically need to drive a manual. An automatic allows a beginner to focus on steering, braking, observation, and traffic rules before adding clutch and gear coordination.
The Bottom Line
Driving is the repeated cycle of see, decide, communicate, control speed, and leave space. Start legally with a calm supervisor, learn the particular car, adjust your seating and mirrors, master starts and stops in a controlled area, and progress gradually to turns, lane changes, reversing, parking, and highway driving. When something goes wrong, slow down, brake, keep control, and choose the safest simple action—never rush to recover a missed turn or maneuver.
Quick Recap
Product prices and availability are accurate as of the date/time indicated and are subject to change. Any price and availability information displayed on Amazon at the time of purchase will apply.