The best tire pressure for cornering and braking is the vehicle manufacturer’s recommended cold pressure—not the maximum number molded into the tire sidewall. Find the front and rear PSI or kPa values on the driver-door tire-information placard or in the owner’s manual, measure when the tires have been parked for at least three hours, and adjust every tire to its specified value. Correct pressure preserves the load balance, contact behavior and heat management the vehicle was engineered to use.
Lowering pressure can make steering feel softer, but it is not a reliable public-road grip upgrade. Underinflation can increase heat, damage risk and braking distance; overinflation can reduce the tire’s ability to conform to irregular pavement and compromise traction. For ordinary driving, placard pressure is the performance baseline.
As an Amazon Associate I earn from qualifying purchases.
What tire pressure gives the best cornering and braking?
Use the cold inflation pressure specified for your exact vehicle, axle and load condition. The values appear on the Tire and Loading Information Label on the driver’s-side door edge or doorpost, or in the owner’s manual. A car may specify different pressures front and rear, and some vehicles list a second setting for a fully loaded cabin or luggage compartment.
The Tool Desk
Outbyte PC Repair FREERepair Windows errors before they cause bigger problemsFix Now →Outbyte Driver Updater FREEFix the driver behind crashes, sound loss and screen glitchesFind Drivers →That recommendation is a cold-pressure target. The National Highway Traffic Safety Administration (NHTSA) defines a cold tire as one that has not been driven on for at least three hours. Check before driving, ideally first thing in the morning. If you measure after driving, the reading will normally be higher because the air and tire have warmed.
#1 Best Overall

- Accurate, Dependable Readings: Factory‑calibrated to ±1 PSI, so you can confidently match your vehicle’s recommended PSI (check the door jamb sticker). Ideal for monthly checks and road trips — consistent results every time, cold or warm.
- Bright Backlit Display & Nozzle Light: The illuminated nozzle helps you find the valve stem in the dark, while the backlit LCD makes readings crystal clear in dim garages or at night. No more squinting or holding a flashlight.
- 4 Measurement Units, One Button: Quickly switch among PSI, Bar, Kgf/cm², and KPA with a single press. No complex settings — just press and cycle to your preferred unit. Perfect for drivers who need multiple scales.
- Broad Compatibility for Everyday Vehicles: 0–150 PSI covers cars, SUVs, motorcycles, and spare tires (often 60 PSI). Fits standard Schrader valves; just press on for a reading.
- Auto‑Off to Extend Battery Life: The gauge automatically powers down after 30 seconds of inactivity, so the included 2*AAA batteries last longer. Always ready for your monthly checks without surprise dead batteries.
The sidewall number is different. It is the tire’s maximum permitted inflation pressure under the tire maker’s conditions, not the normal setting for your vehicle. Running every tire at that maximum can make the ride harsher, accelerate wear in some cases and compromise traction or braking, as Bridgestone’s safety guidance explains.
Why pressure changes cornering and braking
A pneumatic tire is part of the suspension. Its pressure affects how the tread carries load, how the sidewall flexes, how heat builds and how the contact area follows the road. The vehicle maker’s pressure is selected to balance those effects across steering, braking, ride, durability and the vehicle’s front-to-rear weight distribution.
| Condition | Likely handling effect | Braking and safety concern | What to do |
|---|---|---|---|
| Below the placard pressure | Slower or less precise steering response; more sidewall flex and tread squirm | Greater heat buildup, possible internal damage and longer stopping distances; Michelin describes incorrect pressure as reducing grip and increasing braking distance | Inflate to the specified cold value and investigate repeated pressure loss |
| At the placard pressure | Pressure/load balance intended by the vehicle manufacturer | Best starting point for predictable traction, braking and tire durability on public roads | Measure cold and maintain the value for the applicable load setting |
| Above the placard pressure | Sharper initial response can be accompanied by a smaller ability to conform to rough pavement and a harsher ride | Reduced conformity can lower available grip; excessive pressure can compromise traction or braking | Release air slowly while checking with a gauge until the cold target is reached |
These are directional effects, not a promise that one adjustment will produce a fixed percentage change in cornering or stopping. No universal PSI setting produces the shortest braking distance for every car, tire, road and temperature. Tire construction, tread compound, alignment, load, pavement and electronic stability systems all matter.
How to find the correct pressure for your car
Read the driver-door placard
Open the driver’s door and inspect the edge of the door, the doorpost or the nearby body pillar. The label normally gives a front value and a rear value, often in both PSI and kPa. It may also show a higher setting for maximum occupants or cargo. Use the value for the way the car is loaded, not a generic number from another vehicle.
Check the owner’s manual when the label is unclear
The manual can explain load categories, temporary-spare inflation, tire-size variations and whether the listed values apply to original-equipment tires. If the vehicle has different tire sizes front and rear, confirm that you are reading the correct specification for each axle.
Rank #2
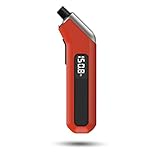
- PROCESS LEVEL ACCURACY: Each ETENWOLF’s digital tire pressure gauge is calibrated manually to ANSI B40.7 Grade 2A(plus-minus 1 PSI).Presta valve adapter not included, if used for bicycles, it must be purchased separately
- ACCURACY IN EXTREME PRESSURE RANGE: Whether tire pressure is below 12 PSI or above 140 PSI, ETENWOLF’s digital tire gauge is accurate as well
- ACCURACY IN EXTREME WEATHER: Built-in AI chip with thermal compensation inside, ETENWOLF’s tire gauge works normally even in extreme cold or hot weather(-4°F-130°F/-20°C-54°C)
- PRESSURE RANGE 3-200 PSI : ETENWOLF’s digital tire pressure gauge can measure pressure of all types of vehicles
- REPLACEABLE AAA BATTERIES: Batteries are easy to replace and helps to extend the tire pressure gauge’s life span, with LED light to illuminate dark areas for easy tire pressure reading
Do not substitute the sidewall maximum
The maximum-pressure marking helps prevent overinflation beyond the tire’s rating; it does not replace the vehicle placard. A tire can safely carry a particular load at a pressure that is lower than its sidewall maximum because the vehicle and tire were matched as a system.
Step-by-step: set tire pressure accurately
- Park long enough for a cold reading. Leave the vehicle stationary for at least three hours. Overnight parking is ideal. Avoid checking immediately after a highway trip, spirited driving or a warm garage period.
- Locate the target values. Read the driver-door tire label or owner’s manual and note the specified front, rear and, if applicable, heavy-load pressures.
- Prepare a reliable gauge and inflator. A digital tire pressure gauge is useful because it gives a clear PSI or kPa reading. Check that the gauge’s range covers your vehicle’s target and that its seal and battery are in good condition.
- Measure every tire. Remove each valve cap, press the gauge squarely onto the valve stem and record the reading. Include the spare; a temporary spare can require a substantially different pressure printed on its label or in the manual.
- Add air when a tire is low. Use an inflator in short bursts, then measure again. Stop at the placard value for that axle and load condition.
- Release air when a tire is high. Press the valve core briefly or use the inflator’s bleed button, then recheck. Do not guess by time or by appearance.
- Verify all four readings. A second measurement catches a gauge that was not seated correctly and confirms that you adjusted the intended valve.
- Replace the valve caps. Caps help keep dirt and moisture away from the valve core. They are not a substitute for repairing a leaking valve or tire.
NHTSA’s TireWise sequence follows the same logic: locate the recommended pressure, check all tires, slowly release excess air, add missing pressure and verify every tire again.
Quick wins for a faster PC:
Fix the driver behind crashes, sound loss and screen glitchesFind Drivers →Clear out junk files and repair common Windows errorsFree Scan →Should you check tire pressure hot or cold?
Use a cold reading for the actual adjustment. Driving flexes the tire and raises its temperature, so a hot gauge reading is expected to be higher than the cold target. If you bleed a hot tire down until it displays the placard number, it may be underinflated after it cools.
If you must add air during a trip, inflate toward the recommended cold pressure rather than intentionally lowering a warm tire to the cold number. NHTSA advises checking again when a genuinely cold reading is available. The temporary correction is less precise because you do not know exactly how much the tire has warmed.
Avoid the “bleed it when hot” mistake
Warm tires are not automatically overinflated. The pressure rise is a normal consequence of heat. Unless a tire or vehicle manufacturer gives a specific hot-pressure procedure, leave the warmed pressure alone and confirm it later when cold.
Rank #3

- PRO ACCURACY - mechanic recommended, performance tested, & calibrated accurate to professional ANSI 2A standards - with dual pressure sensors certified to ±0.50% FS (0.50 PSI), offering reliable readings up to 100 PSI w/ precise readout resolution of 0.10 PSI - so you can now maintain your tires with a shop-grade mechanic trusted tool
- STRONG & RUGGED - feels solid in the hand & built to last from 100% solid brass & steel parts shielded by our shock-resistant gear-style protective guard to protect against drops & impact. Features ultra soft & strong 10" fully rotational, leak-proof HybridFlex air hose w/ 360 swivel angled air chuck that can be swapped out w/ any 1/4" NPT chuck
- ADVANCED ENGINEERING - all readings lock-on to the display until the "ON" button is pressed once to reset to zero. Features built-in air bleeder valve that bleeds pressure in real time without needing to reset the display - ideal for cars, trucks, motorcycles, bikes, RV & trailers, spare tires, and much more
- SMART DISPLAY - features high-resolution digital 2.5 inch LCD display screen w/ battery life indicator & bright LED backlight for high visibility in the dark. Gauge is programmed to auto shut-off after 150 seconds of inactivity to save battery (2x AAA batteries included)
- 100% Lifetime Warranty by JACO - serving the automotive industry for 35+ years. Enjoy longer-lasting tires, improved fuel economy, and superior vehicle performance & handling with properly inflated tires.
How temperature and weather affect the reading
The placard target does not change simply because the calendar changes, but the measured pressure does change as the air inside the tire cools or warms. A cold snap can therefore reveal a low reading even when no air has escaped. Check after substantial temperature changes, especially before a long trip.
Recommended Free Tools
Tire Rack’s commonly cited adjustment heuristic is approximately 1 psi for each 10°F change in ambient temperature. Treat that as a way to anticipate why the gauge moved, not as a replacement for the vehicle’s specified pressure. Do not add a permanent seasonal “bonus” or remove pressure solely to chase a weather-based number.
Should front and rear tires have different PSI?
Yes, when the vehicle placard specifies different values. Front and rear axles carry different loads and perform different jobs: the front tires may carry the engine and steering load, while the rear setting may reflect the suspension design, cargo capacity or stability calibration. Set each axle independently.
Do not equalize all four tires because a single number is easier to remember. Conversely, do not invent a front/rear split based on handling preference. The correct difference is the one listed for your vehicle and current load.
Passenger and cargo loads
Some labels show one pressure for normal use and another for maximum occupants or luggage. Use the higher-load setting only when the vehicle maker instructs you to do so, and return to the normal setting when the load condition changes. Keep the left and right tires on the same axle at matching specified pressures unless a manufacturer’s procedure says otherwise.
Free tools Windows power users keep installed
One-click scans. No signup required.
Rank #4

- Enhanced Visibility in Low Light: Features a green backlit LCD screen and integrated flashlight, allowing for clear reading of tire pressure even in dark or dimly light conditions.
- Durable & Heavy-Duty Design: Constructed from robust stainless steel, specially engineered for RV and truck use. Helps maintain proper tire pressure to reduce wear and extend tire lifespan.
- Nozzle easily forms a seal with the valve stem giving quick and accurate readings in 0.1 increments; 4 settings with longer range: 0-230 PSI / 0-16 Bar / 0-16 Kg/cm² / 0-1585 Kpa
- Wide Pressure Range & Easy Operation: Covers 0-230 PSI / 0-16 Bar / 0-16 Kg/cm² / 0-1585 Kpa. Simply press the “ON/UNIT/OFF” button to turn on, select your unit, and it auto-shuts off after 30-40 seconds to conserve battery.
- User-Friendly & Versatile: Ergonomic non-slip texture ensures a firm grip. Includes batteries and comes with a 1-year warranty. Suitable for cars, trucks, motorcycles, bicycles, and more.
Does lowering pressure create more cornering grip?
For public-road driving, lowering pressure as a generic cornering tactic is not recommended. A lower setting may increase sidewall flex and make the tire feel less abrupt at turn-in, but that sensation is not proof of more usable grip. The additional flex can raise temperature, blur steering precision and increase the risk of impact or structural damage.
Overinflating is not a safe alternative. A very firm tire can feel responsive while following rough pavement less faithfully. Michelin’s guidance summarizes the trade-off as reduced comfort, grip and tire lifespan with overinflation, while underinflation affects vehicle handling and safety.
The only sound road-driving adjustment is the pressure approved for the vehicle, tire and load. If a manufacturer publishes a specific performance procedure, follow that procedure exactly rather than applying a rule from another car.
Independent reader supportYour contribution helps us test, update, and keep practical guides available for everyone.Track driving is a separate pressure problem
Track use involves higher cornering loads, repeated heat cycles and tire specifications that may differ from street guidance. Michelin advises setting pressure at ambient temperature using the tire maker’s road-cold or track-specific specification, warming the tires progressively and avoiding pressure release during a session solely because the tires read higher when hot.
Track instructions are tire- and vehicle-specific. A road placard is the correct starting point for normal roads, but it is not automatically a track target. Use the tire manufacturer’s documented track procedure, observe any stated hot or warm range, and account for ambient temperature, session length, vehicle load and tire construction.
Best Value

- Digital Tire Pressure Gauge 2 Pack, Industrial Tire Gauge 3-200 PSI, Calibrated to ANSI B40.7 Grade 2A(plus-minus 0.5%), Air Pressure Gauge with Replaceable AAA Batteries
- ACCURACY IN EXTREME PRESSURE RANGE: Whether tire pressure is below 12 PSI or above 140 PSI, ETENWOLF’s digital tire gauge is accurate as well
- ACCURACY IN EXTREME WEATHER: Built-in AI chip with thermal compensation inside, ETENWOLF’s tire gauge works normally even in extreme cold or hot weather(-4°F-130°F/-20°C-54°C)
- PRESSURE RANGE 3-200 PSI : ETENWOLF’s digital tire pressure gauge can measure pressure of all types of vehicles
- REPLACEABLE AAA BATTERIES: Batteries are easy to replace and helps to extend the tire pressure gauge’s life span, with LED light to illuminate dark areas for easy tire pressure reading
How often to check and what equipment to use
Check pressure at least monthly and before long trips. Also check before carrying a heavy load, after a major temperature change, when the car has been parked for an extended period and whenever the vehicle begins to pull, wander or feel unusually soft.
- Digital gauge: easy-to-read PSI and kPa measurements; keep a spare battery if the model uses one.
- Dial gauge: durable and fast, but keep it clean and protect it from drops.
- Inflator: a home compressor, service-station unit or portable inflator is useful; verify its reading with your own gauge.
- Valve caps: replace missing caps and inspect for damaged valve stems.
Gauge accuracy matters because a small error can affect whether a tire is actually at the placard target. Compare an unfamiliar gauge with a known-good gauge or a professional tire service when readings seem inconsistent.
Symptoms that pressure is wrong
The car feels vague or wanders
Check all four cold pressures first, including the spare if it is involved in a temporary-wheel installation. A low tire can produce a soft, delayed response. If pressures are correct, inspect for alignment, suspension, tire damage or uneven wear rather than continuing to alter PSI.
What’s actually slowing this PC down?
Pick the symptom - the matching free tool is one click away.
Steering feels harsh and the car skips over rough pavement
Measure the tires cold. An overinflated tire can reduce compliance. Bring it down slowly to the placard value; do not assume that a harsh ride means you need a softer-than-specified setting.
One tire keeps losing pressure
Inflate it to specification and have the tire, wheel, valve stem and bead inspected. Repeatedly adding air without finding the leak leaves the tire vulnerable to heat and casing damage.
The tire-pressure warning light comes on
Check every tire with a gauge rather than relying on appearance. Correct the cold pressures, then follow the vehicle’s reset or relearn procedure if the owner’s manual requires one. A warning system may identify a pressure change but does not replace a gauge measurement.
Pressure rose after a drive
That is normally a temperature effect. Do not bleed the tire to the cold placard number while it is hot; recheck after the vehicle has been parked for the required cold period.
Do these 3 things before closing this tab:
1Clear out junk files and repair common Windows errors2Fix the driver behind crashes, sound loss and screen glitches3Repair Windows errors before they cause bigger problemsA practical decision framework
| Your situation | Measurement to use | Action |
|---|---|---|
| Daily road driving | Cold, after at least three hours parked | Set front and rear tires to the placard or manual values |
| Before a long trip | Cold, before loading or immediately after loading with the applicable load setting | Check all tires and the spare; repair any leak before departure |
| Sudden weather change | Cold, after the vehicle has stabilized | Restore the placard value; do not use a permanent seasonal offset |
| Pressure check during a trip | Warm or partly warm | Add air toward the recommended cold pressure and verify again when cold |
| Closed-course track session | Ambient and, only when specified, controlled warm or hot readings | Use the tire maker’s track procedure, not a generic road rule |
Key mistakes to avoid
- Using the tire sidewall maximum as the everyday setting.
- Checking only the tire that looks low.
- Bleeding a hot tire down to the cold placard number.
- Assuming all four corners require the same PSI.
- Lowering pressure for cornering without an approved vehicle or tire procedure.
- Ignoring a tire that repeatedly loses air.
- Skipping the spare because it is not currently touching the road.
- Trusting a damaged or unverified gauge.
Bottom line for road drivers
Start with the number on the driver-door placard or in the owner’s manual, measure cold, match the front and rear specifications, and check at least monthly. That procedure gives the tire the pressure/load balance designed for your car. Pressure experiments belong only in a manufacturer-defined performance or track procedure; they are not a dependable shortcut to shorter braking or safer cornering on public roads.
Quick Recap
Product prices and availability are accurate as of the date/time indicated and are subject to change. Any price and availability information displayed on Amazon at the time of purchase will apply.




