Recommended Free Tools
Preparing a Royal Enfield Himalayan for a long ride starts with identifying the exact motorcycle—not simply assuming that advice for one Himalayan generation applies to another. The current Himalayan 450 manual and the Himalayan BS VI manual are separate documents, with different specifications and maintenance schedules. Find the manual for your model year, generation and market, bring scheduled maintenance up to date, check fuel and tyres, and repeat the inspections your manual specifies while travelling.
The checklist below separates guidance that is explicitly stated for the BS VI model from advice that applies as a planning method to any Himalayan. Where your motorcycle’s manual is the authority—tyre pressures, payload, service intervals, oil grade, suspension settings or accessory compatibility—use its figures rather than a universal number.
As an Amazon Associate I earn from qualifying purchases.
1. Identify your Himalayan before checking anything
“Himalayan” covers more than one motorcycle specification. At minimum, record the model name, model year or generation, engine version and country market. The Himalayan 450 owner’s manual and the Himalayan BS VI owner’s manual are distinct documents; combining their figures can produce an incorrect tyre pressure, service interval, fluid specification or load limit.
Do these 3 things before closing this tab:
1Repair Windows errors before they cause bigger problems2Scan for outdated or missing drivers - takes under a minute3Clear out junk files and repair common Windows errorsUse Royal Enfield’s country-specific service and owner-resource pages to locate the correct document. If the model year or market is unclear, confirm it with an authorised dealer or service centre before planning a heavily loaded trip. Keep a downloaded or printed copy of the matching manual on the journey, especially if your route crosses areas with limited connectivity.
#1 Best Overall

- For best performance, follow the manufacturer's recommendations in your vehicle owner’s manual
| Question | What to do |
|---|---|
| Which manual applies? | Match the motorcycle’s generation, year and market to the owner’s manual. Do not use a 450 figure on a BS VI motorcycle, or vice versa. |
| Where should specifications come from? | Use the matching manual for tyre pressure, payload, oil and other fluid grades, service intervals, chain adjustment and suspension settings. |
| What if the bike has accessories? | Check that every rack, case, guard or electrical accessory is approved or compatible for that exact model, and follow the manual’s loading instructions. |
2. Bring scheduled maintenance up to date
Long-distance preparation is not a substitute for a due service. Check the service record and the maintenance schedule in the correct manual. If a scheduled service is due, arrange it before departure rather than treating the trip as a test of how far the interval can be stretched.
The Himalayan BS VI manual gives unusually direct long-trip advice: “Service the motorcycle at a Royal Enfield Authorised Dealer / Service Center.” Use an authorised facility when the service interval, a warning light, an unresolved fault or a major adjustment is involved. Ask the technician to record the work and note any parts that may need attention during the trip.
What to ask the service centre to verify
- That all scheduled maintenance for your mileage and model has been completed.
- That any outstanding fault, warning light or starting, charging, braking or handling concern has been diagnosed rather than merely cleared.
- That fasteners, tyres, engine-oil level and the drive chain are in the condition specified by your manual.
- That accessories and luggage mounts do not interfere with controls, suspension movement, lighting or wheel travel.
Royal Enfield says its maintenance schedule assumes average riding conditions. Dust, mud, water crossings, high heat, heavy loads, frequent low-speed work or sustained rough-road use are more severe conditions; in those circumstances, maintenance intervals should be shortened and an authorised service resource should advise you how much.
3. Inspect the motorcycle before loading it
Perform the inspection with the motorcycle clean enough to reveal tyre damage, leaks, loose hardware and chain contamination. A clean, level work area and a cold motorcycle make fluid and visual checks easier. The manual remains the controlling checklist, but the following items are specifically named in the Himalayan BS VI long-trip inspection guidance.
Rank #2

- No fling-off and O-Ring Safe
- Dirt-resistant dry lubricant
- Contains Teflon and Moly for wear protection
- Water resistant and Non-staining
Tyres and wheels
- Look for cuts, punctures, bulges, embedded objects, uneven wear and damage to the sidewalls or tread.
- Check the tread condition against the manual and any legal requirement in your market.
- Set pressure only from the exact manual and the applicable load condition. A solo, lightly loaded motorcycle may have a different specification from a motorcycle carrying a passenger and luggage.
- Recheck pressure when the tyres are cold, unless your manual gives another procedure.
Do not copy a pressure from a different Himalayan generation, a tyre manufacturer’s maximum-pressure marking or an internet forum. Those figures serve different purposes and may not describe the motorcycle’s recommended operating pressure.
Fasteners and visible hardware
Inspect for loose or missing fasteners, especially around luggage mounts, guards, racks, mirrors, controls and any accessory installed after purchase. A bolt that is merely difficult to see can loosen under vibration. Tighten only to the torque and procedure specified for your model; if a critical fastener is missing, damaged or cannot be torqued correctly, have it repaired before riding.
Engine oil and leaks
Check the engine-oil level using the method and position stated in your manual. Do not infer a level from a different generation’s sight glass, fill quantity or oil grade. Look for fresh oil or other fluid on the engine, under the motorcycle and around hoses or covers. A falling level, a new stain or a persistent smell warrants diagnosis before departure.
Lights and horn
Operate the headlamp, tail lamp, brake lamps, turn signals, indicators, instrument illumination and horn. Check the lamps with the engine running if your motorcycle’s system behaves differently with the engine stopped. Replace a failed bulb or address an electrical fault before loading the bike; a spare fuse can be useful only when it matches the value specified for your model.
Rank #3
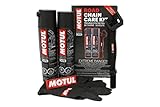
- All-in-one package to clean and maintain your chain
- Includes chain clean, chain lube road, chain brush, motul gloves and decal
- C1 Chain Clean is perfect for removing residue, sand, dirt, and oil.
- C2 Chain Lube Road is a product of MOTUL's racing history, protecting your chain while reducing drag.
- MOTUL gloves and chain brush help remove deposits without creating a mess.
Drive chain
Check chain condition, slack, lubrication and obvious damage according to the manual. The chain should not have seized links, excessive corrosion or damaged rollers. If adjustment is needed, use the manual’s method and alignment marks rather than guessing from appearance. A chain that is worn, kinked or repeatedly loses adjustment needs service, not just more lubricant.
4. Plan fuel for the actual route
The BS VI manual’s long-journey checklist says to ensure sufficient petrol for the planned journey. Build the plan around the real route, not the distance in a brochure. Mark fuel stops, opening-hour limitations, detours, border or mountain crossings and sections where a station may be unavailable.
Allow a practical reserve for navigation errors, weather, traffic, idling, low-speed off-road sections and an unplanned overnight stop. The correct reserve depends on your motorcycle, load, speed and route; the available evidence does not establish one universal range or tank-distance figure for every Himalayan. Refuel when a reliable opportunity appears rather than waiting for the last possible stop.
Free tools Windows power users keep installed
One-click scans. No signup required.
Fuel-planning checklist
- Map the longest gap between dependable fuel stations.
- Compare that gap with your motorcycle’s conservative, real-world range under the planned load and conditions.
- Identify an alternate station or turnaround point for each remote section.
- Carry only fuel containers that are legal, approved for petrol and secured away from heat and ignition sources; follow local transport rules.
5. Set up luggage without exceeding the motorcycle’s limits
Heavy luggage changes steering, braking, suspension movement and tyre loading. Before choosing panniers, a top case, soft bags or a tail pack, find the permitted payload and mounting requirements in the exact manual. The available Himalayan 450 material includes sections for accessories, luggage and suspension settings, but it does not establish one load limit or universal accessory fitment for every generation.
Rank #4

- PREMIUM LUBRICATION: Muc-Off Motorcycle All-Weather Chain Lube is a premium synthetic formulation that ensures first-class performance.
Weigh the load, including the bags themselves. Put dense items low and close to the motorcycle’s centre, keep left and right loads balanced, and prevent movement with secure fasteners and straps. Keep luggage clear of the chain, exhaust, wheels, suspension and controls. Do not allow a strap to reach a hot exhaust or become entangled with a wheel.
Before riding with luggage
- Turn the handlebars fully in both directions and confirm that bags do not pull cables, hoses or wiring.
- Compress the suspension through its available movement, using a safe method, to check that cases and straps cannot contact the tyre.
- Check that rear lighting, indicators, registration markings and reflectors remain visible where required.
- Set suspension preload or other adjustments only as described in the manual for the load and passenger arrangement.
- Recheck every mount after a short loaded test ride.
6. Pack a practical trip kit
Carry equipment that helps you inspect, secure and communicate without pretending it replaces workshop service. Confirm that tools fit your motorcycle before leaving; a tool that cannot reach a fastener is dead weight.
Maintenance and repair items
- The model-appropriate tool kit and any keys or security bits needed for your accessories.
- A tyre-pressure gauge and a way to inflate the tyres that is suitable for the motorcycle and route.
- A puncture-repair solution appropriate to your wheels and tyres, if you know how to use it.
- Spare fuses of the correct rating, a small light and basic gloves.
- Chain lubricant. The manual’s maintenance guidance calls for cleaning and lubricating the rear chain; choose a product suited to motorcycle chains and follow both product and motorcycle-manual instructions.
- Straps or fasteners for securing a loose item, plus a small supply of cleaning cloths.
Rider, navigation and emergency items
- Helmet and protective clothing appropriate to the weather, including waterproof layers and gloves.
- Water, food for delays and a first-aid kit.
- Charged phone, charging lead, offline maps and a backup navigation method.
- Identification, driving and vehicle documents, insurance information and roadside-assistance details.
- Emergency contacts and a written note of allergies or medical information if relevant.
Royal Enfield lists accessories and riding gear, but fitment was not established for every generation or market. Treat a product as compatible only after checking its model application, mounting instructions, load implications and local availability.
7. Conduct a loaded test ride
Do not make the first ride with full luggage the first day of the trip. Take a short local ride with the intended load, passenger arrangement and protective equipment. Check low-speed balance, steering effort, braking feel, wind sensitivity, mirror visibility and whether anything shifts or rattles.
Best Value

- Precision Brush Applicator for Clean Application: Designed with an integrated brush tip for accurate and controlled application, helping ensure even coverage on the chain while reducing mess, overspray, and product waste.
- Long-Lasting Lubrication and Protection: Provides durable lubrication that adheres to the chain surface, helping reduce wear, friction, and elongation while maintaining smooth drivetrain operation over extended use.
- Compatible with Modern Chain Types: Suitable for use on O-ring, X-ring, and Z-ring chains, helping preserve seal integrity while delivering effective lubrication and protection.
- Reduces Friction and Wear: Helps minimize metal-to-metal contact between chain links and sprockets, supporting smoother power transfer and extending the lifespan of drivetrain components.
- Ideal for Street and Performance Riding: Well suited for daily riding, sport use, and touring applications where consistent lubrication, clean application, and reliable protection are required.
Stop after the first few kilometres and inspect luggage mounts, straps, chain clearance, tyre appearance and lights. Repeat the check after the ride when the motorcycle has cooled. Resolve movement, contact, unusual noise, fluid loss or handling change before extending the distance.
8. Use a departure-day checklist
- Confirm that the correct owner’s manual and service record are available.
- Verify that scheduled service is current and that unresolved faults have been repaired.
- Check cold tyre pressures against the manual and load condition.
- Inspect tyre damage and tread, fasteners, oil level, lights, horn and chain condition.
- Confirm enough fuel for the first section and identify the next dependable fuel stop.
- Secure luggage, confirm that controls and lights are unobstructed, and check suspension clearance.
- Test the communication, navigation and emergency equipment.
- Tell someone the route and expected check-in points, particularly for remote travel.
9. Monitor the motorcycle during the ride
Long-distance preparation continues after departure. At fuel stops or rest breaks, walk around the motorcycle and look for a new leak, loose mount, tyre damage, damaged strap, missing fastener or chain problem. Check the engine-oil level at the interval and in the position specified by your manual.
For the Himalayan BS VI, Royal Enfield’s manual says to check loose fasteners, tyre condition, correct engine-oil level, working lights and horn, and proper drive-chain tension after every 1,500 km of running. That 1,500 km interval belongs to the BS VI manual; it is not a universal interval for the Himalayan 450 or other generations. For another model, follow that motorcycle’s own schedule.
Quick wins for a faster PC:
Fix the driver behind crashes, sound loss and screen glitchesFind Drivers →Repair Windows errors before they cause bigger problemsFix Now →Shorten the interval in severe conditions
Dust, mud, water, rough tracks, heat, heavy loads and repeated low-speed work can accelerate chain contamination, fastener loosening and tyre wear. Royal Enfield’s general maintenance guidance says to shorten maintenance frequency for severe or dusty conditions and seek authorised-service advice. A route that is technically shorter can therefore require more inspection than a clean, steady highway journey.
Stop and investigate instead of riding on
- A tyre loses pressure, develops a bulge or shows new structural damage.
- A warning light appears or the motorcycle develops a new electrical, starting, braking or handling fault.
- Oil or another fluid is visibly leaking or the level falls unexpectedly.
- The chain becomes noisy, develops a tight spot, loses adjustment rapidly or shows damaged links.
- A luggage mount, rack, guard or critical fastener is loose or missing.
Move to a safe location, consult the manual’s emergency guidance and arrange qualified assistance when the problem is beyond your tools or training. Do not treat chain lubricant, a spare fuse or a puncture kit as permission to continue with a damaged component.
10. Finish with a post-ride inspection
After the trip, clean off dust and salt so damage is visible. Inspect tyres, chain, fasteners, luggage mounts, lights and the underside for fresh marks or leaks. Recheck the engine-oil level according to the manual and record the distance, route conditions and any adjustment you made.
Tell the service centre about severe dust, water crossings, heavy loading, repeated chain adjustment, tyre damage or any warning light. Those details help determine whether the next maintenance interval should be shorter than the average-condition schedule.
What’s actually slowing this PC down?
Pick the symptom - the matching free tool is one click away.
Quick Recap
What not to assume
| Do not assume | Safer approach |
|---|---|
| One Himalayan tyre pressure fits every year and load. | Use the exact manual’s pressure for your motorcycle and load condition. |
| The 1,500 km inspection interval applies to every Himalayan. | Use it only when following the Himalayan BS VI manual; use the matching interval for other generations. |
| A rack, pannier or riding garment fits every Himalayan. | Verify model fitment, mounting, clearance and payload implications. |
| Average-condition service intervals are suitable for dusty or severe routes. | Shorten inspections and ask an authorised service resource for advice. |
| A generic oil grade, load limit or suspension setting is safe to copy. | Take the specification from the correct owner’s manual. |
Product prices and availability are accurate as of the date/time indicated and are subject to change. Any price and availability information displayed on Amazon at the time of purchase will apply.




