What’s actually slowing this PC down?
Pick the symptom - the matching free tool is one click away.
Choose a campervan solar system from your energy use, not from a generic wattage recommendation. Add every appliance’s daily watt-hours, decide how many sunless days the battery must cover, estimate available sunlight for your destination and season, then verify that the panels, controller, battery voltage, wiring and roof hardware are compatible.
A workable system has two separate jobs: the battery stores energy for night-time and poor-weather use, while the solar array replenishes that energy. The correct setup is therefore the smallest system that meets your loads and autonomy requirement in the conditions where you will travel.
As an Amazon Associate I earn from qualifying purchases.
1. Calculate your daily electrical use first
Make a load list before shopping. For each appliance, multiply its power in watts by the number of hours you expect to use it each day. Add the results to get watt-hours per day (Wh/day):
Recommended Free Tools
Daily energy (Wh) = appliance watts × hours used per day
#1 Best Overall
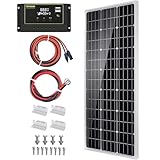
- 100W solar panel kits ideal for 12v battery charging, designed for RVs, cabins, homes, boats, caravan s, back-up and remote power use.
- This kits include 4pcs Z mounting brackets and 1 pair Red and Black Solar Cable makes it easy to set up. Easy to install with pre-drilled holes on the back of panel for fast mounting and securing.
- With the 30A charge controller with PWM function, it can prevent the battery from over charge, over voltage, discharge and short circuit, reversed polarity protection, battery is fully protected. You can expand your system up to a maximum of 260W 12V system or 520W 24V system.
- Dimensions: 1160*510*35mm (45.6*20*1.37 inch). Weight: 15.84 lbs. Voltage at Pmax (Vmp):23V. Current at Pmax (Imp): 4.3A.
- Withstand high winds (2400Pa) and snow loads (5400Pa), strong tempered glass and aluminum frame for extended outdoor use, allowing the solar panel to last for decades.
Victron Energy’s worked example uses a 60 W laptop charger for three hours, a 12 V refrigerator estimated at 500 Wh/day, and 10 W of lighting for four hours. That produces 180 Wh + 500 Wh + 40 Wh = 720 Wh/day. These are illustrative assumptions rather than a promise of typical refrigerator or laptop consumption. See the full method in Victron Energy’s RV solar sizing guide.
| Load | Power and use | Daily energy |
|---|---|---|
| Laptop charger | 60 W × 3 hours | 180 Wh |
| 12 V refrigerator | Estimated daily consumption | 500 Wh |
| Lighting | 10 W × 4 hours | 40 Wh |
| Total | 720 Wh/day |
Include inverter losses for AC appliances
Appliances that plug into a 230 V outlet draw energy through an inverter. Victron’s example allows about 10–15% extra for 230 V loads. Treat that as a planning allowance, not a guaranteed loss figure: the actual inverter, its efficiency at the load level, standby draw and operating time determine the result.
Convert watt-hours to amp-hours only after choosing system voltage
For a nominal 12 V system, the 720 Wh example is approximately 60 Ah per day using the simple conversion Wh ÷ V. Real-world battery and conversion losses mean this is a planning estimate, not a meter reading. Keep the original Wh figure for comparing loads and solar production, then use amp-hours when checking battery capacity at the selected voltage.
Outdated Drivers Are Slowing You Down
One free scan finds every outdated or missing driver and matches the right update for your exact hardware.Free scan · exact hardware matchWindows Errors? Fix Them Before They Spread
Repair common Windows errors and clear accumulated junk for a smoother, more stable PC - no reinstall needed.Free scan · no reinstall2. Set the battery autonomy you actually need
Autonomy is the number of days the van can operate without useful solar charging. Multiply daily consumption by that number, then divide by the fraction of the battery’s rated capacity that you are permitted to use.
Rank #2
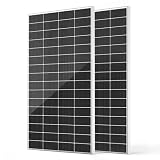
- 【13% Smaller & 14.5% Lighter, Ideal for Class B Vans】Compared to conventional PERC cell panels, this compact and lightweight 200W solar panel is ideal for Class B campervans and tight rooftop spaces. Compared with using multiple 100W panels, it requires fewer mounts and cables, helping reduce the total cost of your off-grid system. With fewer parallel connections, power loss is minimized and energy output is maximized. The panel measures 30.1 × 46.3 × 1.2 inches and weighs 20.17 lb.
- 【Next-Gen N-Type Cells, 30-Year Service Life】Our HQST 200W solar panel features advanced N-Type cell technology, delivering up to 25.4% efficiency and an extended 30-year service life (87.4% output). Compared with traditional P-Type cells, which typically last around 25 years (80% output), N-Type cells offer improved durability and long-term performance.
- 【16BB Grade A+ Cells, all EL-Tested】Built with Grade A+ 16-busbar (16BB) solar cells, this panel improves current collection and reduces resistance compared with traditional 9BB or 5BB designs. The result is more stable energy production, reduced hot spots, and improved durability, especially in high-temperature environments. All cells are EL-tested to ensure there are no microcracks or hidden defects.
- 【Reliable Performance in Low-Light Conditions】N-Type cells perform better in low-light conditions such as cloudy days, early mornings, and late afternoons, helping generate more usable energy throughout the day. With improved light response and higher energy yield, the panel delivers more consistent power when sunlight is limited.
- 【Built to Last for Decades】Designed for demanding outdoor environments, this solar panel features a corrosion-resistant aluminum frame and IP65 waterproof protection. It is rated to withstand 2400 Pa wind loads and 5400 Pa snow loads, ensuring reliable operation in harsh conditions. Built for long-term durability, it can provide stable solar power for decades. Perfect for RVs, vans, trailers, boats, farms, rooftops, tiny houses, sheds, and off-grid solar systems.
Victron recommends planning at least two off-grid days for dry camping when solar is the primary charging source, and three days for long trips, full-time van living, frequent bad weather or winter use. Those are manufacturer recommendations, not a universal rule; your route, driving schedule and access to alternative charging can justify a different target. The recommendation is explained in Victron Energy’s RV battery-bank guide.
Use usable capacity, not the label capacity
The same guide uses about 90% of rated capacity as a general lithium planning figure and about 50% for lead-acid. The selected battery’s permitted state-of-charge limits, temperature requirements, battery-management system and manufacturer instructions take precedence.
| Autonomy target | Energy required from loads | Nominal lithium capacity at 90% usable | Nominal lead-acid capacity at 50% usable |
|---|---|---|---|
| 2 days | 1,440 Wh | About 1,600 Wh (approximately 133 Ah at 12 V) | About 2,880 Wh (approximately 240 Ah at 12 V) |
| 3 days | 2,160 Wh | About 2,400 Wh (approximately 200 Ah at 12 V) | About 4,320 Wh (approximately 360 Ah at 12 V) |
The table applies only to the 720 Wh/day example and the stated generic usable-capacity assumptions. It does not select a battery for every campervan. Check the battery’s actual voltage, rated energy, allowable depth of discharge and charging limits before ordering.
3. Estimate the solar array for your destination and season
Once the daily load is known, divide it by expected peak sun hours for an initial array estimate:
Rank #3
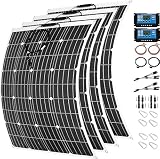
- 1.[Excellent performance] NEW Using high-quality monocrystalline silicon cells, high-efficiency monocrystalline silicon solar cells provide good performance even in low light conditions
- 2.[Flexible] This flexible solar panel is a good choice for curved surfaces of RV, boat,sailboat, yacht,truck, car, coach, cabin, camper , tent , trailer, golf cart or any other irregular surface
- 3.[Practicality] Light energy converts electrical energy and has strong practicability. It is a good supplement for power shortages and places where the city power cannot reach, such as mountains, marine, deserts, etc
- 4.[Nice Details] The water resistant flexible solar panel is far more durable than traditional glass and aluminum models; The junction box is sealed and waterproof
- 5.[Easy Installation]The solar panel has 6 grommet mounting holes are available to attach fasteners,and can also be installed with silicone and adhesive tape
Initial panel wattage (W) = daily energy (Wh) ÷ peak sun hours
For the 720 Wh/day example and five peak sun hours, the calculation is 720 ÷ 5 = 144 W. Victron presents five peak sun hours as an Alpine summer assumption. It is not a global, year-round value. Location, season, roof angle, shading, dirt, temperature and obstructions all change production, so regard 144 W as a starting calculation rather than a guaranteed output.
Allow for recovery, not just one day’s consumption
If the van must both run its loads and recover a depleted battery in roughly four to five peak sun hours, the array may need to be much larger than the daily-replacement figure. In the same worked scenario, Victron gives approximately 450–500 W as a more practical example for recharging a larger battery bank in that window. That figure belongs to the example’s load, battery and sunlight assumptions; it is not a universal campervan target.
Model the poor days you expect to encounter
- Use conservative sunlight assumptions for the season in which you will travel rather than an annual average that hides winter shortfalls.
- Account for the hours when the roof is shaded by trees, buildings, roof boxes, vents or other panels.
- Expect dirt and partial shade to reduce real output below the nameplate calculation.
- If you can drive regularly, alternator or shore charging may cover prolonged low-sun periods; if you cannot, increase storage, array size or both.
4. Choose a panel format that suits the roof and how you park
Panel format is a physical and maintenance decision as much as an electrical one. Victron’s component overview compares rigid, flexible and portable approaches; read it alongside your roof layout and travel habits at Victron’s RV electrical-system component guide.
Rank #4
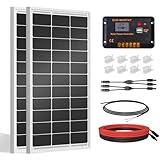
- [Wide Application]: Daily Output 800wh/day under 4 hours full sunshine condition. Perfect for RV, Caravan, Marine, Camper, Electric scooter, Golf Carts, Power wheels, Trolling motor, Tool trailer, Backup power supply for cabin shed home etc.
- [Excellent Performance]: ECO-WORTHY solar panels use high-performance monocrystalline solar cells, which can provide up to 21.5% higher efficiency sufficient light conditions.size:35.2*23.1.37in
- [Durable]: Corrosion-resistant aluminum alloy frame, so that the panel can be used for decades, and can withstand strong wind (2400Pa) and snow load (5400Pa), with a long service life. Ip65 rated junction box provides complete protection.:
- [Complete and Easy]: The back of the pre-drilled and plug-and-play cables allow quick installation, the kit can be connected in series (24V) or parallel (12V) if you need. What you will get: 2 pcs 100W mono solar panel + 2 set of Z mounting brackets + 30A solar controller + 1 pair of 16.4ft 10 awg solar cables + 1 pair of 2-in-1 connectors + 1 pair of 4.92ft tray cable.
- [Support]: 1 year with 24/7 tech support, if any problems or questions about the product,please do not hesitate to let us know through Amazon or call ECO-WORHTY hotline for solution.
| Format | Strengths | Trade-offs and best fit |
|---|---|---|
| Rigid roof panels | Durable roof-mounted installation and better airflow than panels mounted close to the roof, according to Victron. | Need suitable roof area, structural mounting and a planned cable-entry route. Check clearances around vents and service areas. |
| Flexible panels | Thin and light, and able to follow slight roof curves. | Victron’s guide says they are less efficient and do not last as long as rigid panels. Follow the particular panel’s bonding, ventilation and service instructions. |
| Portable panels | Can be moved into direct sun when the van is parked under trees or beside a building. | Require deployment, storage and cable management. Victron’s cost guide says a fixed array combined with a portable array requires two separate solar charge controllers: RV solar system cost and configuration guidance. |
Measure the usable roof before choosing wattage
Draw the roof in plan view and mark vents, skylights, air-conditioning equipment, antennae, roof racks and service clearances. Compare each panel’s physical length and width—not only its wattage—to the remaining area. A panel that fits electrically but blocks a vent or leaves no safe cable-entry route is not a workable choice.
5. Match the charge controller to the array and battery
The controller sits between the panels and battery. Its limits must accommodate the array’s combined open-circuit voltage (Voc) and short-circuit current (Isc), while its battery setting must match the battery voltage and chemistry. Confirm every limit in the controller manual and panel documentation; do not size from nominal panel wattage alone.
PWM versus MPPT
| Controller type | Where it can fit | What to verify |
|---|---|---|
| PWM | Simple and generally less expensive; can suit smaller systems when panel voltage is close to battery voltage. | Panel voltage must be appropriate for the battery and controller, and current capacity must cover the array. |
| MPPT | More efficient and commonly preferred for higher-capacity systems or arrays whose operating voltage differs substantially from battery voltage. | Maximum PV voltage, maximum charging current, battery voltage range and supported battery-charge settings. |
Controller choice is not a substitute for checking the whole electrical design. A controller with a suitable wattage label can still be unsuitable if the array exceeds its maximum Voc or Isc, or if its battery profile does not support the selected battery.
Free tools Windows power users keep installed
One-click scans. No signup required.
Understand series and parallel panel wiring
- Series: panel voltages add while current remains approximately the same. The higher array voltage can help the controller start in lower light, but shading one panel can reduce the output of the string.
- Parallel: voltage stays approximately the same while currents add. This can be more tolerant of some shading patterns, but the higher current may require thicker conductors and suitable overcurrent protection.
Choose the arrangement from the exact panel Voc/Isc, controller limits, cable run and roof shade pattern. Check the combined values in the configuration you will actually install, including any maximum-series-panel or maximum-parallel-current limits stated by the manufacturer. Renogy’s wiring guidance provides a further compatibility checklist at Renogy UK’s caravan and campervan solar guide.
Best Value

- 【High Conversion Rate】This 20W solar panel with monocrystalline A+ solar cell has an excellent cell efficiency of 21%-30%. Designed to charge and maintain 12V rechargeable batteries like LiFePO₄, Lithium Ion, AGM, SLA, GEL, EFB, MF, etc. Keep batteries in charged for trailer, tractor, truck, boat, motorcycle, RV, car, lawn mower, water pump, gate opener, electric fence, etc
- 【Built to Last】 Low-iron tempered glass surface and corrosion-resistant aluminum frame, make this solar panel 100% waterproof and rustproof, and provide the prolonged lifespan up to 25 years. This 12V solar panel can withstand all weather conditions such as sandstorm, strong wind, thunderstorm, blizzard, hail, etc. It can withstand up to 2400Pa wind pressure and 5400Pa snow load
- 【Smart MPPT Controller】The charging efficiency of this upgraded 10A controller is 30% higher than other controllers on the market. Its intelligent three-stage charging design effectively prevents the battery from overcharging, over-voltage and short circuit. It takes no power from the battery. You will clearly know the charging status of the battery through the two indicator lights on the controller
- 【360° Adjustable Bracket & Plug-and-Play Installation】Comes with a fully 360° angle adjustable mounting bracket, which allows you to adjust the solar panel to the optimal sun-facing angle for maximum solar energy absorption and higher charging efficiency. Pre-drilled mounting holes and matched screws greatly simplify the installation process, no complicated tools or professional skills are required. All cable connections support plug-and-play, enabling quick and effortless installation and disassembly for both indoor and outdoor scenarios.
- 【Complete Accessories & Reliable After-Sales Service】Our SOLPERK Solar Panel kit includes 1*20W solar panel, 1*smart MPPT charge controller, 1*adjustable mounting bracket, 1*alligator clip, 1*O-ring and a full set of mounting accessories to meet your diverse installation and use needs. We offer 1-year professional after-sales service and lifetime technical support, with 7×24-hour online customer service to respond to your questions and solve problems within 24 hours, bringing you a worry-free shopping and using experience.
6. Specify the complete system, not just panels
A safe installation is a system of matched components. Include the following before comparing kits or individual parts:
| Component | Selection question |
|---|---|
| Solar panels | Do their physical dimensions fit the roof, and do their Voc and Isc work with the intended wiring and controller? |
| Solar charge controller | Does it support the array’s combined voltage and current and the battery’s voltage and charging settings? |
| Battery bank | Does its usable energy cover the chosen autonomy at the selected system voltage? |
| Inverter | Can it supply the continuous and startup demand of the AC loads, and have its standby and conversion losses been included? |
| DC distribution and protection | Are there correctly rated fuses, holders, isolation and distribution points for each circuit? |
| Cables and terminations | Are conductor sizes, insulation, connectors and cable lengths appropriate for the actual current and installation route? |
| Mounting and cable entry | Are the brackets, bonding or fasteners, glands and seals suitable for the roof material, movement and weather exposure? |
| PV isolation | Can the array be isolated for servicing in the manner required by the equipment and local rules? |
The component list and installation sequence are covered in Victron Energy’s component guide. Select cable and protection ratings from the actual design rather than copying a generic fuse or cable size.
7. A practical design procedure
- Inventory every load. Record each appliance’s wattage, expected daily runtime and whether it runs on 12 V DC or through an AC inverter.
- Calculate Wh/day. Multiply watts by hours for each item, add them, and apply an explicit inverter-loss allowance to AC loads. Keep occasional high-power tools separate from normal daily consumption so they do not disappear in an average.
- Choose autonomy. Decide how many days without useful solar charging you want. Use two days as Victron’s minimum dry-camping planning example and three for long, full-time, frequently cloudy or winter use, then adjust for your actual charging opportunities.
- Calculate usable battery energy. Multiply Wh/day by autonomy days. Divide by the permitted usable fraction in the battery documentation; the 90% lithium and 50% lead-acid figures are only general planning examples.
- Check the physical layout. Measure roof area, obstructions, shade and cable-entry distance. Decide whether a fixed, portable or mixed array matches where you park.
- Estimate array wattage. Divide daily Wh by realistic peak sun hours for the route and season. Increase the array when it must also restore a depleted battery within a short sun window.
- Select the controller. Check maximum PV Voc and Isc in the exact series or parallel configuration, charging-current capacity, battery voltage and supported battery settings.
- Design conductors and protection. Size cables, fuses, holders, isolation and distribution for the actual currents, cable lengths and equipment instructions.
- Plan installation and service access. Leave room to inspect connections, isolate the PV array and replace equipment without dismantling unrelated interior fittings.
- Commission methodically. Follow the panel, controller and battery manuals, set the correct battery profile, verify polarity before energising circuits and confirm that charging behavior matches the equipment documentation.
8. Installation and electrical-safety boundaries
Roof mounting, cable entry, battery connections and DC protection all need weatherproofing, mechanical support and strain relief appropriate to a moving vehicle. Keep conductors protected from abrasion and heat, and ensure every protective device is accessible for inspection and replacement.
Renogy UK describes its installation guide as guidance rather than a replacement for product manuals or professional electrical advice. Its UK-specific advice is to use a qualified installer when the work includes mains sockets, shore power, inverter-chargers or 230/240 V wiring: Renogy UK’s campervan solar installation guide. Vehicle wiring rules and electrical codes differ by country, so follow the requirements where the van is registered and used.
9. Troubleshoot by separating loads, storage and generation
| Symptom | Likely area to check | Corrective direction |
|---|---|---|
| Battery reaches its low limit before morning | Daily load or usable capacity is larger than estimated. | Recalculate appliance runtime and inverter losses, reduce nonessential loads, or increase usable battery capacity and charging input. |
| Battery recovers slowly on clear days | Array size, shade, dirt, orientation, cable losses or controller configuration. | Inspect the array and cable path, clean panels as appropriate, compare measured controller input with expected conditions, and reassess peak-sun assumptions. |
| Controller reports a PV over-voltage or over-current condition | Series Voc or parallel Isc exceeds the controller limit. | Disconnect safely, verify the panel configuration against the manual, and redesign the series/parallel layout or controller capacity before reconnecting. |
| Roof installation produces little when parked under trees | Partial shade is limiting the fixed array. | Move the van if possible or use a portable array positioned in direct sun. A mixed fixed-and-portable arrangement needs two separate controllers under the cited Victron configuration guidance. |
| AC equipment drains the battery faster than expected | Inverter conversion and standby consumption were omitted or underestimated. | Measure or obtain the inverter’s efficiency and idle draw, then revise the Wh/day calculation and battery requirement. |
10. How to judge a campervan solar kit
A kit is useful only when its included parts match your design. Before buying, check these points in the listing and manuals:
- Panel dimensions and mounting method fit the available roof, including service clearances.
- Panel Voc and Isc remain within the controller’s limits in the proposed wiring arrangement.
- The controller supports the battery voltage and chemistry, with appropriate charging settings.
- The stated wattage is compared with your calculated Wh/day and expected sun hours rather than presented as a universal van size.
- Included cable, connectors, fuses, isolators, mounts and cable-entry hardware suit the actual installation; missing protection hardware can make a low-priced kit incomplete.
- The kit leaves a clear path for future inspection, replacement and expansion without exceeding controller or roof limits.
For a small, low-demand van with panels operating close to battery voltage, a correctly specified PWM kit may be adequate. For a larger array, longer cable run or variable panel voltage, an MPPT design is often the more suitable starting point. In either case, documented voltage, current and battery compatibility matter more than the kit’s headline wattage.
Final decision rule
Choose the setup in this order: calculate Wh/day, select autonomy, size usable battery capacity, estimate solar wattage from realistic peak sun hours, choose the panel format that fits your roof and parking conditions, then verify controller limits, wiring, protection and installation hardware as one system. The 720 Wh/day, 144 W and 450–500 W figures above are scenario-bound examples; your campervan’s loads, battery chemistry, destination, season and shade determine the correct values.
Quick wins for a faster PC:
Clear out junk files and repair common Windows errorsFree Scan →Scan for outdated or missing drivers - takes under a minuteDriver Scan →Quick Recap
Product prices and availability are accurate as of the date/time indicated and are subject to change. Any price and availability information displayed on Amazon at the time of purchase will apply.




