The Tool Desk
Outbyte Driver Updater FREEFix the driver behind crashes, sound loss and screen glitchesFind Drivers →Outbyte PC Repair FREEClear out junk files and repair common Windows errorsFree Scan →The five most common causes are a leaking valve-cover gasket, a failed oil-pan or drain-plug seal, an improperly sealed oil filter or housing, a worn crankshaft or camshaft seal, and excessive crankcase pressure from a faulty PCV system.
Those are starting points—not automatic diagnoses. Oil can travel across the engine, through valleys and shields, or along the underbody before it drips. The puddle’s location may be far from the failed seal, so identify the highest fresh wet spot before buying parts.
First, decide whether it is actually engine oil
Engine oil is usually greasy and may be amber, brown, or nearly black depending on its age and contamination. But transmission fluid, coolant, power-steering fluid, brake fluid, and even A/C condensation can appear underneath a car.
Color, odor, feel, and location are useful preliminary clues, not proof. If the fluid is thin and red, brightly colored, watery, sweet-smelling, or unusually clear, do not assume it is engine oil. A technician may need to clean the area and trace the fluid to its source.
#1 Best Overall
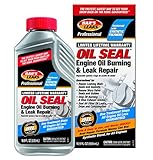
- DON'T GAMBLE ON AN UNPROVEN BRAND: A leaking engine, head gasket, cooling system, power steering or transmission is your one shot to avoid a bigger repair bill – reach for the brand proven for over 75 years
- REPAIRS LEAKING MAIN SEALS AND GASKETS: We have designed this product to work in all gasoline and diesel engines including turbocharged, EcoBoost, hybrid and even racing engines.
- RENEWS WORN VALVE SEALS AND GUIDES: Your vehicle is a good candidate for Bar’s Leaks Oil Seal Engine Oil Burning & Leak Repair if it does not consume more than one quart of oil per day.
- STOPS OIL BURNING & BLUE EXHAUST SMOKE: This covers 3, 4, 5, 6, 8 and 10 cylinder engines in all cars, trucks, vans and SUV’s. Our product can also be used in heavy-duty applications referencing the appropriate dosage level.
- SEAL ALL OTHER OIL LEAKS, DRIPS AND CONSUMPTION: This applies to a wide range of other motor applications too - tractors, boats, RV’s, motorcycles (including wet clutch), ATV’s, lawn equipment.
Also remember that an engine can lose oil without leaving a puddle. Burning oil, an incorrectly checked oil level, or another consumption problem can coexist with—or be mistaken for—an external leak.
The five common causes
1. A valve-cover or other upper-engine gasket has hardened or shifted
The valve cover, also called a rocker cover on some engines, seals the top of the cylinder head. Its gasket lives in a hot environment and can harden, shrink, crack, or lose its sealing ability with age. Some covers also incorporate the PCV valve, baffles, or other components, making the repair more than a simple rubber-gasket replacement.
Typical clues:
- Fresh oil or dampness high on the side or top of the engine
- Oil running downward from the cover’s edge
- Oil around spark-plug wells on engines where the cover seals those wells
- A burning-oil smell if oil reaches a hot exhaust manifold or other exhaust component
The smell is a warning, not a precise diagnosis. Oil from a higher leak can run toward the exhaust side, and oil from another component can produce the same odor.
Repair reality: Some engines use a molded gasket; others require sealant at specified corners or joints. Bolt order and tightening specifications can matter, and overtightening can distort a cover or damage its fasteners. Use the service procedure for the exact year, model, engine, and engine code rather than assuming every valve-cover gasket is installed the same way.
What’s actually slowing this PC down?
Pick the symptom - the matching free tool is one click away.
2. The oil pan, drain plug, or drain-plug washer is leaking
The oil pan is exposed to road debris, corrosion, impact, and vibration. A dented pan can distort its sealing surface, while a gasket or sealant joint can deteriorate. The drain plug and its washer are additional leak points—especially after an oil change.
Typical clues:
- Fresh oil at the bottom of the engine
- Wetness centered around the drain plug or washer
- A dented, cracked, corroded, or visibly damaged pan
- A leak that began immediately after service
A low drip point does not prove the pan is the source. Oil from a valve cover, filter housing, timing cover, or another higher location can collect on the pan and make it look guilty.
Rank #2

- Compatible with petroleum, semi-synthetic, and full synthetic motor oils
- Renews worn seals with no risk of damage or eventual corrosion
- Reduces engine noise and oil consumption, while raising oil pressure
- Contains no harmful solvents
A replacement washer or correctly installed drain plug may solve the problem. However, damaged threads, a distorted pan, contamination on the sealing surface, or overtightening may require additional repair. Never crawl beneath a vehicle supported only by a jack. If an underside inspection is necessary, use properly rated jack stands or have a qualified technician perform it.
3. The oil filter, filter seal, housing, or oil-cooler gasket is not sealing
A filter leak can be surprisingly severe because oil is pumped through the filter area while the engine is running. Common causes include a loose filter, a damaged or twisted filter gasket, dirt on the mating surface, an old gasket left stuck to the engine, an incorrectly tightened filter adapter, or a deteriorated seal between an oil-filter housing and the engine.
Do these 3 things before closing this tab:
1Scan for outdated or missing drivers - takes under a minute2Repair Windows errors before they cause bigger problems3Fix the driver behind crashes, sound loss and screen glitchesSome engines also use a gasket or seal at an oil cooler or oil-filter module. That seal can leak even when the filter itself was installed correctly.
Typical clues:
- Oil appearing soon after an oil change or filter replacement
- Oil concentrated around the filter, filter cap, housing, or cooler
- Oil streaming down from the filter area while the engine is running
- A rapidly growing leak rather than a slow seep
Timing after an oil change is an important clue, but it is not conclusive proof that the service caused the leak. An older housing gasket can fail at the same time by coincidence.
The correct filter type, oil specification, gasket lubrication, installation method, and torque depend on the vehicle. Do not simply tighten a filter or housing “until it feels tight.” Excessive force can crush a gasket, strip threads, crack a plastic housing, or distort an adapter. If the filter area is leaking heavily, shut the engine off and check the oil level before running it again.
4. A crankshaft or camshaft seal is worn or damaged
Crankshafts and camshafts pass through the engine block, timing cover, or cylinder head. The seals around those rotating shafts can wear from age, heat, contamination, or a worn sealing surface on the shaft.
Rank #3

- RESTORES PERFORMANCE: Contains a combination of the best performance additives to repair the most common oil-related problems
- INCREASES COMPRESSION AND HORSEPOWER: Restores lost compression and power, reduces noise and oil consumption, while improving the performance of worn cylinders, rings, bearings, and seals
- STOPS LEAKS, NOISE, AND SMOKING: For most vehicles, this is your last chance before paying an expensive repair bill or replacing the vehicle
- FRICTION MODIFIERS: Engine Repair can be used to top off the existing oil when low, or add a bottle when changing the oil and filter
- REPAIR-IT: Engine Repair-It can be used to top off existing oil when low or add a bottle when changing oil.
A front crankshaft seal or camshaft seal may leave oil behind a pulley or around the timing cover. A rear main seal can allow oil to appear near the junction between the engine and transmission. These locations are suggestive, not definitive.
Oil can migrate through the crankcase valley, covers, or other passages and imitate a rear-main-seal leak. A leak high on the engine may also travel down the back of the block and collect at the bellhousing or oil pan.
Typical clues:
- Oil emerging from behind a crankshaft pulley or timing cover
- Oil near the engine-transmission junction
- Leakage that becomes more apparent with the engine running
- Oil accumulating inside a timing-belt cover on engines where that area is sealed
Repair reality: Access may require removing belts, pulleys, covers, or—in some rear-seal designs—the transmission. Because the labor can be substantial, confirm the source before authorizing an expensive rear-main-seal repair. A clean-and-recheck procedure or fluorescent dye test can prevent replacing the wrong seal.
5. A restricted or malfunctioning PCV system is raising crankcase pressure
The positive crankcase ventilation system removes blow-by gases and controls pressure inside the crankcase. Depending on the vehicle, it may use a valve, calibrated orifice, hoses, a separator, a non-return valve, or components integrated into the valve cover, intake manifold, or another assembly.
Free tools Windows power users keep installed
One-click scans. No signup required.
If the system is restricted or a check valve is missing or malfunctioning, crankcase pressure can rise and push oil past otherwise serviceable gaskets and seals. General causes include a plugged PCV orifice, blocked hose, failed valve, or incorrect component after a previous repair.
Typical clues:
- Several seals appear to leak at once
- A leak returns soon after a gasket or seal is replaced
- Oil is forced from a new or previously dry sealing point
- Oil vapor or oil residue appears in the intake system
- Oil consumption or related engine-management symptoms accompany the leak
Some oil vapor in an intake system is normal on certain closed-PCV designs, so residue there does not automatically prove a failure. Proper crankcase-pressure testing and inspection of the vehicle’s complete PCV layout are more reliable than replacing a visible gasket repeatedly.
Rank #4
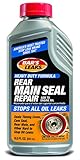
- Seals timing cover, cam seal, rear main and other hard to stop oil leaks
- Add to engine oil
- Specifically designed to seal rear main leaks, but also works better than a conventional stop leak on all other leaks
- Add entire bottle of Rear Main Seal Repair to engine crankcase (where you add oil) at or between oil changes. Do not overfill. Most leaks will stop within 100 miles or 2 days of driving
Fixing only the gasket can provide a temporary result if pressure remains excessive. The PCV diagnosis must be vehicle-specific because the serviceable part may not be a standalone valve.
How to find the actual leak source
- Verify the fluid. Examine the fluid’s color, thickness, odor, and location, but treat those observations as clues only.
- Check the oil level correctly. Park on level ground and follow the owner’s-manual procedure. Depending on the vehicle, that may involve checking after the engine has been stopped for a specified period. Do not overfill. A falling dipstick level can reflect an external leak, oil consumption, or both.
- Start at the top. With the engine off and cool enough to inspect safely, look for the highest fresh wet area. Inspect the valve cover, oil-pressure or oil-temperature sensors, filter housing, timing-cover area, and oil-filler-neck seal before blaming the lowest wet component.
- Clean the suspected area. Old oil makes every lower component look wet. A technician can clean the engine and underbody, run the engine, and observe where fresh oil first appears. Some leaks occur only at operating temperature, higher engine speed, or while driving.
- Use fluorescent dye when necessary. OEM diagnostic procedures use fluorescent engine-oil dye and a UV diagnostic lamp to reveal difficult leaks. A compatible automotive UV oil leak detection kit can help locate the source, but it does not repair a failed seal. Follow the dye maker’s dosage and compatibility instructions; when uncertain, ask a technician.
- Recheck after a short drive. If the area stays clean while idling but becomes wet after driving, airflow may be moving the oil or the leak may depend on engine load, temperature, or pressure.
Do not diagnose from a puddle alone. Oil can move through engine valleys, under covers, behind shields, and along underbody panels. Wind can also carry a moving leak rearward.
What to look for in a UV leak-detection kit
For a difficult external leak, the practical combination is compatible fluorescent engine-oil dye plus a suitable UV inspection lamp. OEM procedures support this as a locating method. When choosing an automotive UV oil leak detection kit, check that the dye is intended for engine oil and that the kit includes instructions for the required amount and inspection conditions.
An automotive UV leak detection flashlight can be useful if you already have compatible dye, but a household black light should not automatically be assumed to meet every automotive diagnostic requirement. Wear eye protection as appropriate, keep the lamp and hands clear of belts and fans, and inspect only with the vehicle safely positioned.
If you already own a compatible lamp, engine oil leak detection dye may be the lower-cost option. Do not confuse diagnostic dye with stop-leak additive: dye helps reveal where oil is escaping; it is not a substitute for repairing a gasket, seal, housing, pan, or pressure problem.
Leaking oil versus burning or consuming oil
A car can lose oil without leaving an external puddle. Blue or gray smoke from the tailpipe can indicate that oil is entering the combustion chamber and burning. Worn valve-stem seals, piston rings, or other internal problems can contribute to oil consumption. A ventilation fault can also affect oil use.
Quick wins for a faster PC:
Clear out junk files and repair common Windows errorsFree Scan →Fix the driver behind crashes, sound loss and screen glitchesFind Drivers →Repair Windows errors before they cause bigger problemsFix Now →Repeatedly low oil on the dipstick therefore does not prove an external leak. Check the level regularly using the owner’s-manual method and note how much oil is needed over a known distance. Smoke from the engine bay, by contrast, may indicate oil leaking onto a hot exhaust component and deserves prompt inspection.
Independent reader supportYour contribution helps us test, update, and keep practical guides available for everyone.When it is unsafe to keep driving
Stop driving and shut the engine off as soon as it is safe if you see a low-oil-pressure warning, observe severe active leakage, hear unusual engine noise, see smoke from the engine bay, or find the oil level below the safe range.
Best Value
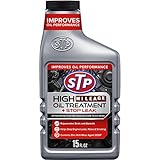
- Protect the engine in your high-mileage vehicle with STP High Mileage Oil Treatment + Stop Leak. Formulated especially for vehicles with over 75,000 miles, this high-viscosity engine additive includes ZDDP oil additive as an anti-wear agent for protection. This STP oil treatment creates a thick cushion between moving engine parts to help fight metal-to-metal friction. Engine stop leak helps to rejuvenate seals and gaskets and stop engine leaks, noise and smoking to improve performance. Add to engine oil with each oil change during car maintenance. It's suitable for cars, light trucks and SUVs.
- One 15 fl oz bottle of STP High Mileage Oil Treatment + Stop Leak
- ZDDP oil additive prevents wear to protect your high-mileage vehicle
- High-viscosity formula creates a thick cushion between moving engine parts to reduce friction
- Leak stopper helps prevent engine leaks, noises and smoking and helps to rejuvenate seals and gaskets
For a low-oil-pressure warning, manufacturer instructions generally direct the driver to stop safely, avoid restarting the engine, check the oil level according to the owner’s manual, and contact service. Adding oil may restore the level, but it does not explain why pressure was low or why oil was lost. A failing oil pump, blocked pickup, sensor issue, or internal engine problem can also be involved.
A small seep may not require immediate towing, but it still deserves prompt attention. Oil can reach exhaust components, belts, electrical connectors, and the road, while a slow leak can become a rapid one without warning. If you cannot safely inspect the source or keep the oil level within the specified range, arrange professional service or roadside assistance rather than guessing.
Before replacing a part
- Record when the leak began and whether it followed an oil change, repair, impact, or overheating event.
- Photograph the highest wet point before cleaning the area.
- Confirm the oil level and the correct oil specification from the owner’s manual.
- Give the technician the vehicle’s year, make, model, engine, and—when needed—VIN or engine code.
- Ask whether the source was confirmed after cleaning, running, driving, or using dye.
- Ask whether crankcase pressure, a warped sealing surface, damaged threads, or a housing problem could cause the leak to return.
For DIY work, a vehicle-specific automotive repair manual can provide the relevant oil capacity, lifting points, torque specifications, inspection procedure, and engine-specific gasket or seal details. Verify the exact year, make, model, engine, and edition before relying on it. Generic gaskets and washers are not universal.
Why the vehicle matters
Not every engine uses the same gasket layout or PCV design. One vehicle may have a conventional valve cover and replaceable PCV valve; another may integrate the ventilation system into the cover or intake manifold. Oil-filter housings, oil coolers, timing covers, bed plates, oil-galley plugs, sensors, and filler-neck seals also vary by engine family.
That is why a list of common causes should guide inspection, not dictate a parts order. Identify the vehicle and confirm the leak path before buying a gasket, drain-plug washer, filter seal, or complete housing.
Frequently Asked Questions
Can I keep driving with a small engine-oil leak?
Only after confirming that the oil level is safe, the leak is minor and stable, no warning light or unusual noise is present, and oil is not reaching hot exhaust or moving components. Check the level frequently and arrange repair promptly. Do not drive with a low-oil-pressure warning, severe active leak, smoke from the engine bay, unusual engine noise, or oil below the safe range.
Recommended Free Tools
Why is oil dripping from the back of the engine?
The rear main seal is one possibility, but oil from a valve cover, timing area, oil-pressure component, filter housing, or crankcase valley can travel to the engine-transmission junction. Clean the area and confirm where fresh oil first appears before approving a rear-main-seal repair.
Does an oil leak always mean the gasket is bad?
No. The cause may be a drain-plug washer, filter seal, cracked or warped housing, damaged threads, a shaft seal, sensor, oil-galley plug, or excessive crankcase pressure from a PCV fault. Replacing a gasket without confirming the source can lead to a repeat leak.
Will engine-oil stop-leak fix the problem?
Do not treat stop-leak additive as a diagnosis or dependable repair. Fluorescent leak-detection dye is different: it helps locate an external leak under UV light but does not seal it. The correct repair depends on the failed component and the vehicle-specific procedure.
The Bottom Line
Most engine-oil leaks come from an upper gasket, oil pan or drain plug, filter or housing seal, shaft seal, or excessive crankcase pressure—but the visible drip is only a symptom. Confirm the source from the highest fresh wet point, use compatible UV dye when necessary, and verify the vehicle-specific repair procedure before buying parts. Treat low oil pressure, severe loss, smoke, or unusual engine noise as a stop-driving problem.
Quick Recap
Product prices and availability are accurate as of the date/time indicated and are subject to change. Any price and availability information displayed on Amazon at the time of purchase will apply.