Recommended Free Tools
Check your vehicle’s low-beam pattern on a level surface against a wall or screen, using the distance, reference marks, loading and target specified in its owner’s manual. The beam’s cutoff—the distinct boundary between the lit and unlit areas—is the feature to inspect. There is no single cutoff height or wall-measurement target that applies to every vehicle.
What a wall check can—and cannot—tell you
A wall check lets you compare the low-beam cutoff with reference lines set out in your vehicle’s instructions. Toyota technical instructions describe the cutoff as “a distinct line, below which light from the headlights can be observed and above which it cannot.” In other words, look for the boundary in the beam pattern, then assess its position against the marks specified for your vehicle.
As an Amazon Associate I earn from qualifying purchases.
The line’s expected position depends on the vehicle and the procedure, so a generic diagram or a target copied from another make is not a reliable standard. Even two published procedures that both use a wall about 25 ft away do not necessarily use the same reference points or cutoff target.
PC Slower Than It Used to Be?
A free scan shows the junk files, broken settings and background clutter dragging Windows down - then fixes them in one click.Free scan · Windows 10 & 11Crashes, No Sound, or Screen Glitches?
Random freezes, missing sound and display glitches usually trace back to one bad driver. Find and replace yours safely.Free scan · under a minuteA correctly set up wall check can show whether a pattern appears out of position relative to the vehicle-specific marks. It cannot establish the correct aim if you do not know the applicable target, or if the setup does not match the procedure. A wall and tape measure help establish the test conditions; they do not tell you what target is right for your vehicle.
#1 Best Overall

- 13 ft. Of reach*: allows for easy measurements when working alone (*based on maximum extension of average professional user)
- Compact size: easy to grip and store in any tool belt
- Easy grip design: extensive rubber overmold provides a comfortable grip and impact resistance
- Easy read fractions: fractions printed on the blade in alternating colors and heights for quick, easy measurements
- Includes: (1) CMHT37443S Tape Measure
The measurements in the manufacturer examples below illustrate why the owner’s manual or model-specific service information must govern. They are not universal specifications, and they should not be combined into a new procedure.
Set up the check for your vehicle
Find the owner’s manual or model-specific service instructions before measuring. Read the whole aiming procedure, including any illustration: the distance, point from which it is measured, vehicle loading, lamp setting and cutoff target work together. Follow the instructions for the exact vehicle rather than assuming that a procedure for a different model applies.
- Surface and alignment: Use level ground and position the vehicle square to a wall or screen, perpendicular to it. The screen and vehicle centerline need to be aligned as the procedure directs. Toyota’s cited instructions call for a level area, the screen’s center line aligned with the vehicle and the screen perpendicular to the ground.
- Distance: Measure from the reference point specified in the vehicle instructions—not an assumed bumper location. Keep the stated distance exact. A tape measure can help establish the distance, but it does not identify the correct target.
- Vehicle condition: Check tire pressure, use the prescribed or representative load, and settle the suspension if the procedure calls for it. These details matter because manufacturer procedures include them as part of the setup. Do not substitute an arbitrary load or skip a stated preparation step.
- Lighting setting: Use low beams and the specified control setting. Toyota’s cited instructions call for a low-beam setting rather than automatic-light control. Do not judge the target using high beams if the procedure specifies low beams.
- Reference marks: Mark the headlamp centers, vertical centerlines and horizontal height only as described for that vehicle. Removable tape can serve as a mark if appropriate, but it does not supply the correct target. Use the exact reference points in the manual rather than estimating a line from the edge of the lamp or bodywork.
If you cannot provide the specified distance, check whether the vehicle’s own instructions give an alternative and a corresponding different target. Do not simply move the vehicle closer while leaving the original target unchanged. The Toyota technical instructions discussed below allow one particular alternative distance, but with a changed target zone; that does not establish a general shortcut for other vehicles.
Check the low-beam cutoff step by step
- Read the vehicle-specific procedure. Note its setup distance, how to establish the headlamp reference points, the load and tire-pressure requirements, and the target for the cutoff. Check whether the procedure specifies an aim dot, beam step, horizontal line or vertical references. If any of those details are unclear, do not substitute a generic aiming chart.
- Prepare the vehicle and screen. Park on a level surface, set the prescribed load and tire pressure, settle the suspension if instructed, and align the vehicle square to the screen at the stated distance. A vehicle angled to the wall or a screen that is not aligned as prescribed can make the comparison unreliable.
- Make the reference marks. Transfer the headlamp center height and vertical centerlines to the wall or screen using the method in the manual. The marks must correspond to the actual headlamp reference points. Some procedures describe a particular point on the headlamp; follow that description rather than choosing a convenient point.
- Switch on the low beams. Observe each beam’s cutoff against the specified horizontal and vertical references. Compare the pattern with the vehicle’s target, not with the other headlamp alone or an unrelated vehicle’s target. The cutoff is the feature to inspect, but the relevant part of that cutoff and its allowed position are defined by the procedure.
- Decide what to do next. If the cutoff falls outside the specified target, the manual calls for adjustment, or you cannot confidently interpret the marks, arrange service using the vehicle-specific procedure. Do not adjust by guesswork or adopt a target solely because it looks familiar from another vehicle.
A wall test is an inspection, not a substitute for the adjustment instructions. If the pattern is outside the target, the next action depends on the vehicle’s procedure. Some manuals describe an owner-level check; the cited 2011 GM manual recommends taking the vehicle to a dealer if the headlamps need adjustment.
Rank #2

- 20% more compact grip**: For improved ergonomics and control
- Integrated finger brake: For improved blade control
- Fractional blade graphics for quick and easy measuring
- Durable blade coating for longer blade life
Why one vehicle’s target may not fit another
Published procedures differ in distance, reference points and the permitted cutoff position. Some compare a bottom edge with a horizontal line; another cited procedure considers the right side of a beam-pattern step. The measurements below are useful for understanding that variation, not as interchangeable instructions:
| Source and context | Setup and target stated | How to use the example |
|---|---|---|
| Toyota technical instructions hosted by NHTSA, 2019 document | Vehicle at 90 degrees to a wall on level ground; headlamp center marks 7.62 m (25 ft) from the wall. If that distance is unavailable, the document permits exactly 3 m (9.84 ft), with a changed target zone. It gives an allowable band of 101.6 mm (4.00 in) around the stated reference lines at 7.62 m, or 39.9 mm (1.57 in) at 3 m. | The alternative distance changes the target. The values apply to that document’s procedure and illustration, not to every Toyota or every vehicle. The target zone must be taken from the document’s illustration and instructions. |
| 2011 GM owner’s manual excerpt hosted by NHTSA | 25 ft (7.6 m) from a light-colored wall, level ground through to the wall, vehicle perpendicular to it, properly inflated tires and normal vehicle loading. The procedure transfers the headlamp aim-dot height to the wall and checks the beam’s bottom edge against a horizontal tape line. | The manual recommends dealer service if adjustment is needed. The aim-dot reference and bottom-edge check belong to this manual’s procedure; follow the instructions for the applicable model. |
| GM service bulletin PIT5374A, 2015 | Level ground and a screen 25 ft (7.62 m) away. It compares the low-beam cutoff at the right side of the beam-pattern step with a horizontal line; its example target is between the line and 0.75 in (19 mm) below it. | This is the target for the bulletin’s vehicle and procedure, not a general cutoff specification. Do not treat its 0.75 in figure as a target for another vehicle. |
The table shows two important sources of variation. First, the setup distance can differ, and a procedure that allows a shorter distance may also change its target. Second, procedures may tell you to inspect different reference features or parts of the cutoff. A matching distance by itself does not make two targets equivalent.
For example, both the cited Toyota and GM material include a 25 ft setup, but the Toyota document describes a band around its reference lines, while the GM bulletin describes a boundary below a horizontal line at a particular beam-pattern step. Those figures cannot be averaged, substituted for one another or applied based only on the fact that both tests use a wall. The applicable manual or service instructions take precedence.
Do these 3 things before closing this tab:
1Clear out junk files and repair common Windows errors2Fix the driver behind crashes, sound loss and screen glitches3Repair Windows errors before they cause bigger problemsNHTSA Interpretation 21406.ztv discusses cutoff measurement in a federal photometric regulatory context. Its 10 m and 10 mm measurement discussion is not a DIY wall-check instruction or a general consumer target. Do not use regulatory measurement language as a shortcut around the vehicle-specific procedure.
Rank #3

- 16-foot retractable measuring tape for personal or professional use
- Provides both SAE and metric measurements
- Wide 3/4-inch blade with easy readability
- Convenient belt clip and lanyard for easy access
- Molded, impact-resistant case with easy grip-ability
Clues that warrant an inspection
- Oncoming drivers flash their high beams: A 2011 GM owner’s manual says this can mean the vertical aim needs adjustment. Treat it as a possible clue, not proof: a flash alone does not diagnose the cause or tell you the correct target. Check the pattern using the applicable procedure.
- The vehicle has been in a crash or sustained front-end damage: That history is a reason to check the lamps and their mounting, but it does not by itself establish that aim is wrong. A properly set up comparison or a vehicle-specific service inspection can assess the pattern.
- A bulb was recently replaced: An improperly seated replacement bulb can produce an incorrect light pattern, according to GM service bulletin PIT5374A. Verify proper seating under the vehicle’s instructions and inspect the pattern before assuming the aim adjustment itself is the problem.
- The pattern does not match the vehicle’s target: A mismatch on a correctly prepared wall check is a reason to follow the specified adjustment or service procedure. Recheck that the distance, alignment, load, tire pressure and reference points match the instructions before drawing a conclusion.
These clues point to reasons to investigate, not independent proof that a headlamp is incorrectly aimed. In particular, a driver’s flash or a recent repair does not provide a measured target. Use the wall check only when you can set it up and interpret it according to the exact vehicle instructions.
When to have the headlights aimed professionally
Use the vehicle-specific adjustment procedure only if it is clear and appropriate for your vehicle. If the manual says adjustment should be handled by a dealer, follow that recommendation; the cited 2011 GM manual makes that recommendation for its own context. Professional inspection is also the sensible next step if you cannot establish the correct marks, the pattern misses its specified target, or damage may have affected a lamp or its mounting.
When arranging service, ask whether the shop will use the target and procedure for your exact vehicle and whether its check accounts for the setup conditions specified by the manufacturer. A shop’s procedure should be judged by whether it identifies the target for that vehicle, not by whether its generic diagram resembles the wall pattern you saw at home.
A tape measure and removable marking tape can help with a DIY check when the manual calls for measured distance and wall marks. They are setup aids, not aiming instruments: neither tool tells you the vehicle-specific cutoff position. Professional headlamp inspection or aiming service is a relevant option when adjustment is needed, but the sources cited here do not establish a standard service price or a universal adjustment requirement. Ask the provider about the procedure for your vehicle rather than relying on an unsupported price or generic target.
Rank #4

- QUICK & EASY MEASUREMENTS: Fractions printed on the blade
- ADDED GRIP: Rubber overmold for added grip
Sources
- Toyota, “Technical Instructions: Headlight Aiming” (NHTSA-hosted, 2019 document)
- General Motors, “2011 GM Owner’s Manual, Headlamp Aiming excerpt” (NHTSA-hosted)
- General Motors, “PIT5374A: Headlamp Aiming Procedure” (NHTSA-hosted, 2015)
- NHTSA, Interpretation 21406.ztv (April 6, 2000) concerns cutoff measurement in a federal photometric regulatory context; its measurement discussion is not a DIY wall-check target.
Frequently Asked Questions
Can I use a 25 ft wall distance for any vehicle?
No. Toyota and GM examples use about 25 ft, but their reference points and cutoff targets differ. Use the distance and target in the manual or service instructions for your exact vehicle. Do not combine one source’s distance with another source’s target.
What if I cannot set up the vehicle 25 ft from a wall?
Check the vehicle-specific procedure for an approved alternative and its matching target. The cited Toyota instructions allow exactly 3 m (9.84 ft) with a changed target zone; that alternative is not a general rule for other vehicles.
Does an oncoming driver flashing their high beams mean my headlights are misaligned?
It can be a clue. A 2011 GM owner’s manual says flashing from oncoming drivers can mean vertical aim needs adjustment, but it is not a diagnosis. Check the beam against the correct vehicle-specific target or arrange an inspection.
Free tools Windows power users keep installed
One-click scans. No signup required.
Could a replacement bulb make the pattern look wrong?
Yes. GM service bulletin PIT5374A says an improperly seated replacement bulb can cause an incorrect light pattern. Check bulb seating using the vehicle’s instructions and assess the pattern before assuming the aim adjustment is the cause.
Best Value
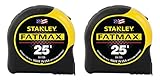
- 11-foot Standout; 16-inch and 19.2-Inch stud center markings simplify framing jobs
- Blade arm our coating on the first 3" maximizes durability of the blade
- Mylar polyester film extends life of entire blade
- Top-forward blade lock makes locking and unlocking easy
- High-impact ABS case with durable rubber-holds up to heavy use
Can I adjust the lights myself if the wall check shows a mismatch?
Only follow a clear adjustment procedure that applies to your vehicle. If the manual is unclear or recommends service, arrange professional help. The cited 2011 GM manual recommends dealer service if adjustment is needed in its model context.
What tools do I need, and how much does professional aiming cost?
A tape measure can help establish the specified distance, and removable tape can mark the wall if the procedure calls for it. These do not supply the correct target. The reviewed sources do not provide a standard price for professional aiming; ask a provider about the procedure and cost for your vehicle.
The Bottom Line
Inspect the low-beam cutoff against the reference marks and target specified for your exact vehicle, with the required setup conditions in place. If the pattern misses that target, the procedure is unclear, or damage or bulb seating may be involved, use model-specific service rather than guessing from a generic wall chart.
The Tool Desk
Outbyte PC Repair FREEClear out junk files and repair common Windows errorsFree Scan →Outbyte Driver Updater FREEScan for outdated or missing drivers - takes under a minuteDriver Scan →Quick Recap
Product prices and availability are accurate as of the date/time indicated and are subject to change. Any price and availability information displayed on Amazon at the time of purchase will apply.