A starter solenoid can fail in more than one way. It may not receive the start command, it may click without passing enough current to the starter motor, or its internal coil may be open. The quickest way to separate those faults is to test the solenoid in the vehicle before removing anything.
These three tests cover the control signal, the high-current circuit, and the removed solenoid itself. Before starting, identify whether your vehicle uses a solenoid mounted directly on the starter or a separate remote starter relay/solenoid. Terminal names and layouts vary, so confirm them with the vehicle service information.
As an Amazon Associate I earn from qualifying purchases.
Safety and preparation
- Place an automatic transmission in Park or a manual transmission in Neutral.
- Apply the parking brake and keep clothing, tools, and meter leads away from belts, fans, and other moving parts.
- If the engine must crank during a test, disable fuel or ignition according to the vehicle service procedure.
- Do not crank for more than 10 seconds at a time. Allow at least 60 seconds for the starter to cool before trying again.
- Use a fully charged battery when possible. A good start-signal reading does not prove the battery can supply starter current.
1. Test the solenoid’s start-signal voltage
This is the fastest test for a no-click or no-crank condition. It tells you whether the solenoid is receiving the command to engage.
Procedure
- Set a digital multimeter to DC volts.
- Connect the black meter lead to a clean engine block or starter housing ground.
- Identify the solenoid’s small start-signal terminal. It is commonly marked S, KS, or 50, but do not assume the marking on every starter is the same.
- Back-probe that terminal while an assistant turns the ignition key to Start. On push-button vehicles, use the normal start command.
- Compare the reading with the manufacturer’s specification. DENSO lists 11.4 volts minimum at a typical starter’s KS terminal, but the vehicle service manual takes priority.
| Reading and symptom | Likely direction |
|---|---|
| Specified voltage is present, but there is no click | Suspect the solenoid coil, solenoid ground, starter assembly, or an internal solenoid fault. |
| Voltage is low or absent | Check the battery, battery cables, grounds, ignition switch, starter relay, neutral-safety switch, clutch interlock, connectors, wiring, immobilizer, and control-module logic. |
| A solid click occurs, but the engine does not crank | Continue with the loaded voltage-drop tests. The solenoid may be engaging while its main contacts have excessive resistance. |
Do not condemn the solenoid simply because the meter shows low voltage. A corroded connector or failing starter relay can prevent the solenoid from receiving enough voltage. Conversely, a normal signal does not prove that the battery and main cables will hold voltage under load.
#1 Best Overall

- Versatile Digital Multimeter - Accurately measures AC/DC Current, AC/DC Voltage, Capacitance, Frequency, Duty Cycle, Resistance, Diode, Continuity and Temperature.
- Thoughtful Design - Support Data Hold, Large LCD Backlit Screen, Auto Shut-off and Kickstand make the process of measurements easier. Professional level is reflected in some features include Auto-Ranging capability, and True RMS for measuring both AC Current and Voltage.
- Suitable For Many Occasions - This Multimeter is a golden partner to help to troubleshoot a variety of automotive and household electrical problems safely and accurately.
- Ensure Safety - Double ceramic fuse is anti-burn and protects from overloading,and it will be more secure and reliable; F400mA/600V and F10A/600V explosion-proof ceramic fuse tubes can protect the multimeter effectively.
- Additional Tips - Please take off the cap before using the test leads. Check the manual for more usage information.
2. Perform a loaded voltage-drop test
Voltage drop is measured while current is flowing. This is more useful than measuring cable resistance with the vehicle switched off because loose terminals, corroded crimps, broken cable strands, and undersized cables can pass a static resistance check but fail under starter load.
Test the positive side
- Place the red meter lead directly on the battery positive post—not just on the cable clamp.
- Place the black lead on the starter’s large B+ or battery terminal.
- Have an assistant crank the engine and record the highest reading.
This reading is the voltage lost through the positive battery cable and its connections.
Test the ground side
- Place the red lead on clean metal on the starter housing or engine block.
- Place the black lead directly on the battery negative post.
- Crank the engine again and record the highest reading.
This measures loss through the engine ground path, ground cable, and their connections.
Free tools Windows power users keep installed
One-click scans. No signup required.
Rank #2

- Additional Tips - The following incorrect operations may cause the multimeter not to show results: Firstly, the plugs of test leads are not fully inserted or not inserted into the correct sockets. Secondly, the manual rotary switch is not placed in the correct position. In addition, this meter can not test all AC Current and below 100mV AC Voltage. Please check the user manual carefully before measurement.
- Versatile Digital Multimeter - Accurately measures AC/DC Voltage, DC Current, Resistance, and Diode. This Multimeter is a really useful tool for solving industrial and household electrical issues. Suitable for Household Outlets, Fuses, Batteries (including Vehicles), Automotive Circuit Troubleshooting, Charging Systems, Testing electronics in Cars etc.
- Troubleshooting with Accuracy - This Multimeter has a sampling speed of 2 times per second; Built-in a backlight LCD display with 3 ½ digits (1999 count) 0.6”, and high polarity including negative and positive readings.
- Ensures Safety - Double fuse is anti-burn and protects from overloading. The silicone cover can protect the multimeter from failing damage and prevent electric shocks. And low battery indication will be displayed when battery power is low.
- Ease of Use - Support Data Hold and Continuity Buzzer. Includes Convenient feature like LCD Backlit Screen makes it easy to use in dimly light areas. Batteries/Set of Test Leads/User Manual are Included.
| Test | General guideline |
|---|---|
| Positive side | Approximately 0.3 volts or less |
| Ground side | Approximately 0.2 volts or less |
| Total starter-circuit loss | Approximately 0.2–0.5 volts; DENSO and Delco Remy specify 0.5 volts maximum for a 12-volt starter circuit in their published procedures |
Use the service-manual specification when it differs from these general figures. A high positive-side reading points toward a loose or corroded battery terminal, damaged cable, poor crimp, or undersized cable. A high ground-side reading points toward a bad engine ground strap, corroded connection, damaged ground cable, or poor starter-to-engine contact.
Check the solenoid’s main contacts
If the cable drops are acceptable but the starter still will not crank, measure directly across the solenoid’s two large terminals while the solenoid is engaged. One lead goes on the battery-side stud and the other on the starter-motor-side stud. Delco Remy specifies no more than 0.2 volts across the magnetic-switch contacts under its specified 100-amp test load.
A high reading across those two studs indicates excessive resistance in the solenoid’s main contacts. The solenoid can click normally and still fail this test because worn or burned contacts cannot carry starter current.
Rank #3

- VERSATILE FUNCTIONALITY: Measures AC/DC voltage up to 600V, 10A DC current, 2MΩ resistance; additional features include continuity, diode test and battery test
- LEAD-ALERT PROTECTION: LEDs on the meter illuminate to indicate proper test lead placement, enhancing accuracy and safety during measurements
- BACKLIT DISPLAY: LCD shows clear readings in low-light conditions for enhanced visibility
- BATTERY TEST: Battery test mode can be used for checking if batteries are working
- CONVENIENT FEATURES: Test lead holders on the back of the meter, kickstand and optional magnetic hanger (Cat. Nos. 69445 or 69417) for hands-free operation
3. Bench-test the removed solenoid
Bench testing is appropriate after removing the solenoid or starter. It requires the exact terminal identification and test sequence for that application. Do not apply power based only on the apparent position of a terminal.
Check coil continuity
- Disconnect the solenoid from the vehicle.
- Use the wiring diagram or service manual to identify the pull-in and hold-in coil circuits.
- Measure continuity or resistance as specified by the manufacturer.
- Compare the result with the factory specification.
An open circuit where the manual specifies continuity indicates a defective winding. Avoid substituting a generic resistance value: solenoid coil resistance varies by design. Also remember that continuity alone does not prove that the coil can create enough magnetic force or that the main contacts can carry starter current.
Perform the functional pull-in and hold-in test
Factory procedures commonly use this sequence:
- Disconnect the motor or field terminal from the solenoid so the starter motor cannot operate.
- Apply the specified battery voltage to the start terminal.
- Ground the solenoid through the specified terminal or starter housing.
- Verify that the plunger pulls in and remains engaged as required by the service manual.
The two windings have different jobs. The pull-in winding helps move the plunger, while the hold-in winding keeps it engaged after the main contacts close. An open hold-in winding can cause chatter or make the plunger drop out immediately. Use a fused test lead and the manufacturer’s wiring diagram; an incorrect bench connection can damage the solenoid or create an unexpected motor operation.
Rank #4
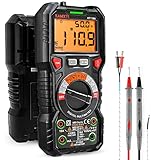
- WIDE APPLICATIONS: KAIWEETS HT118A Multimeter measures up to 1000V DC voltage and 750V AC voltage, 10A AC/DC current and 60 MOhms resistance, electrical tester also tests temperature, capacitance, frequency, duty-cycle, wire on-off, and test diodes and continuity
- EASY OPERATION: Switch the dial to the function you need, and the LED lights on the jacks will shine accordingly. To plug in the leads is easy. Autoranging saves you the hassle of having to know which range of value. Large 2.9” LCD backlight display, easy-to-read digits offer a 6000-count resolution
- MULTI-FUNCTION: Non-contact voltage testing and Live function with sound and light alarm. Flashlight on the back ensures easy use in dimly lit places. Min/Max/Average to record signal fluctuations. Stable kickstand, Pen slot on the back, Low battery prompt, Data retention, Auto power-off
- SAFETY FIRST: IEC Rated CAT III 1000V, CAT IV 600V, CE, RoHS certified. Anti-Burn with double ceramic fuse and thermistor protection circuit. High Voltage Protection is active on all ranges. Double insulated unit. Silicone protective case prevents it from falling damage
- AFTERSALES: KAIWEETS provides a 36-Month after-sale service, lifetime technical support. Please feel free to contact us if you have any concerns. Package includes multimeter, test leads, thermocouple, batteries and user manual. ( Note: Please take off the cap before using the leads)
How to interpret common symptoms
| Symptom | Possible causes |
|---|---|
| No click and no crank | Missing start signal, discharged battery, wiring or interlock problem, open solenoid coil, or a solenoid ground fault. |
| One solid click but no crank | Weak battery, excessive cable voltage drop, worn solenoid contacts, failed starter motor, or a mechanically locked engine. |
| Rapid clicking | Low battery voltage, excessive resistance in the control circuit, or an open hold-in circuit causing dropout. |
| Starter engages, then drops out | Low system voltage or excessive resistance preventing the solenoid from staying engaged. |
| Starter spins without turning the engine | Inspect the starter pinion, overrunning clutch, and engine ring gear. This is not automatically a solenoid failure. |
Why the screwdriver-bridge test is not enough
Bridging the two large solenoid terminals with a screwdriver can make the starter crank, but it bypasses the solenoid’s switching contacts and does not test its control coils. It can also cause a large spark and make the engine crank immediately if the vehicle is not safely prepared. Treat it as a hazardous bypass test, not a definitive diagnosis.
Likewise, a continuity beep only shows that a circuit is not open. It does not test magnetic force, contact performance under load, or voltage loss. A click only proves that the plunger moved; it does not prove that the solenoid can deliver current to the starter.
What’s actually slowing this PC down?
Pick the symptom - the matching free tool is one click away.
For additional manufacturer procedures, see DENSO’s starter troubleshooting guide, Fluke’s starter voltage-drop procedure, and Delco Remy’s voltage-drop guidance.
Best Value
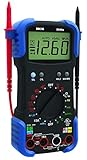
- Designed to pinpoint engine problems; tests alternator diodes, duty cycle, solenoids, breaker points, wiring, switches and more
- Features auto-ranging, auto shut-off and over-load protection
- Measures up to 15 amps for device testing
- 10 MegOhm input impedance; safe for electrical and automotive use; prevents damage to the vehicle’s ECU
- Includes temperature probe, inductive RPM clamp and carrying case
FAQ
How do I test a starter solenoid without removing it?
Back-probe the small start-signal terminal with a multimeter set to DC volts. With the key held in Start, compare the reading with the vehicle specification; around 11.4 volts is a typical DENSO minimum at a KS terminal. Then perform positive- and ground-side voltage-drop tests while cranking.
What does it mean if the starter solenoid clicks but the starter does not crank?
The click shows that the plunger moved, not that the solenoid is carrying current. Test the battery and cable voltage drops, then measure across the solenoid’s two large terminals while engaged. Excessive voltage there indicates worn or burned main contacts.
Can I test a starter solenoid with an ohmmeter?
You can check the pull-in and hold-in coils for an open circuit, but use the manufacturer’s resistance specification. An ohmmeter cannot prove that the solenoid develops enough magnetic force or carries starter current under load.
Do these 3 things before closing this tab:
1Clear out junk files and repair common Windows errors2Scan for outdated or missing drivers - takes under a minute3Repair Windows errors before they cause bigger problemsIs jumping the two large solenoid terminals a reliable test?
No. It bypasses the solenoid’s switching contacts and does not test the control coils. It can also cause sparking and make the engine crank immediately, so it is hazardous unless the vehicle is properly secured and the procedure specifically calls for it.
The Bottom Line
Start with the start-signal voltage, then test voltage drop while the starter is loaded. If the signal and cables are good but the solenoid still will not engage or passes excessive voltage across its main contacts, the solenoid is a strong suspect. Bench-test the removed unit only with the correct wiring diagram and factory specifications.
Quick Recap
Product prices and availability are accurate as of the date/time indicated and are subject to change. Any price and availability information displayed on Amazon at the time of purchase will apply.




